Summer Recipe Roundup

A few weeks ago, a friend of mine asked if I could post some fun, summer recipes. The problem is that because summer has just begun (or not even, officially), I can’t really start experimenting or playing around with summer recipes yet until the produce is available. I did get a pretty good haul this past weekend and hopefully will have some recipes to share with you at the end of the week, but for now, what I thought might be nice is to round up several recipes from previous summers, with links, so you can dive into the archives and go with something tried and true. So here ya go, Janessa.

Summer Recipe Roundup

Creamy Avocado Linguine with Meyer Lemon and Arugula
shrimp avocado pasta

Although avocados are technically in season all the time, this dish is decidedly summer. The addition of shrimp make it seasonal for the Eastern Seaboard, and it’s just so damn refreshing.
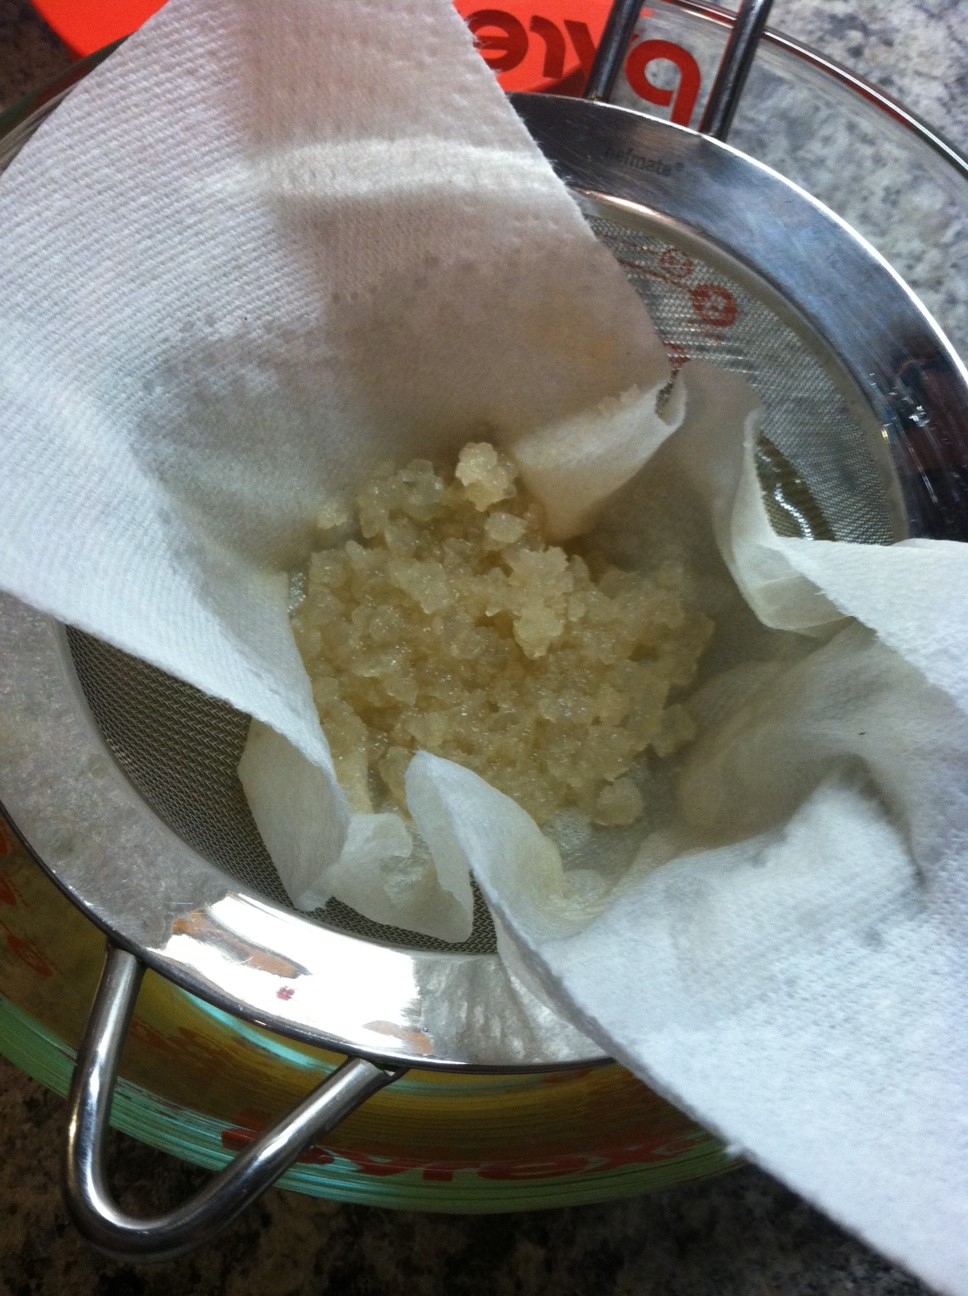
 

Dried Strawberries

Dried Strawberries

There are still some strawberries in the fields around here – if they’re still available where you are, a great way to save them is to dry and freeze them. Great on salads, in cereal, oatmeal, yogurt, etc.

Eggplant Rotini with Roasted Veggies

eggplant Rotini

This is one of my favorite summer recipes. Quick, fresh, easy and adaptable to whatever veggies you have on hand. Don’t go through the summer without making this.

Local Yokel Mojito
20130415-183149.jpg

Of course I had to add a beverage in, but mojitos, with fresh mint from your garden, are the epitome of summer sipping. My mint is already coming up like crazy, and if yours is too, then don’t let another Happy Hour go by without making this.

Roasted Beet Salad with Vinaigrette
Beets in vinaigrette

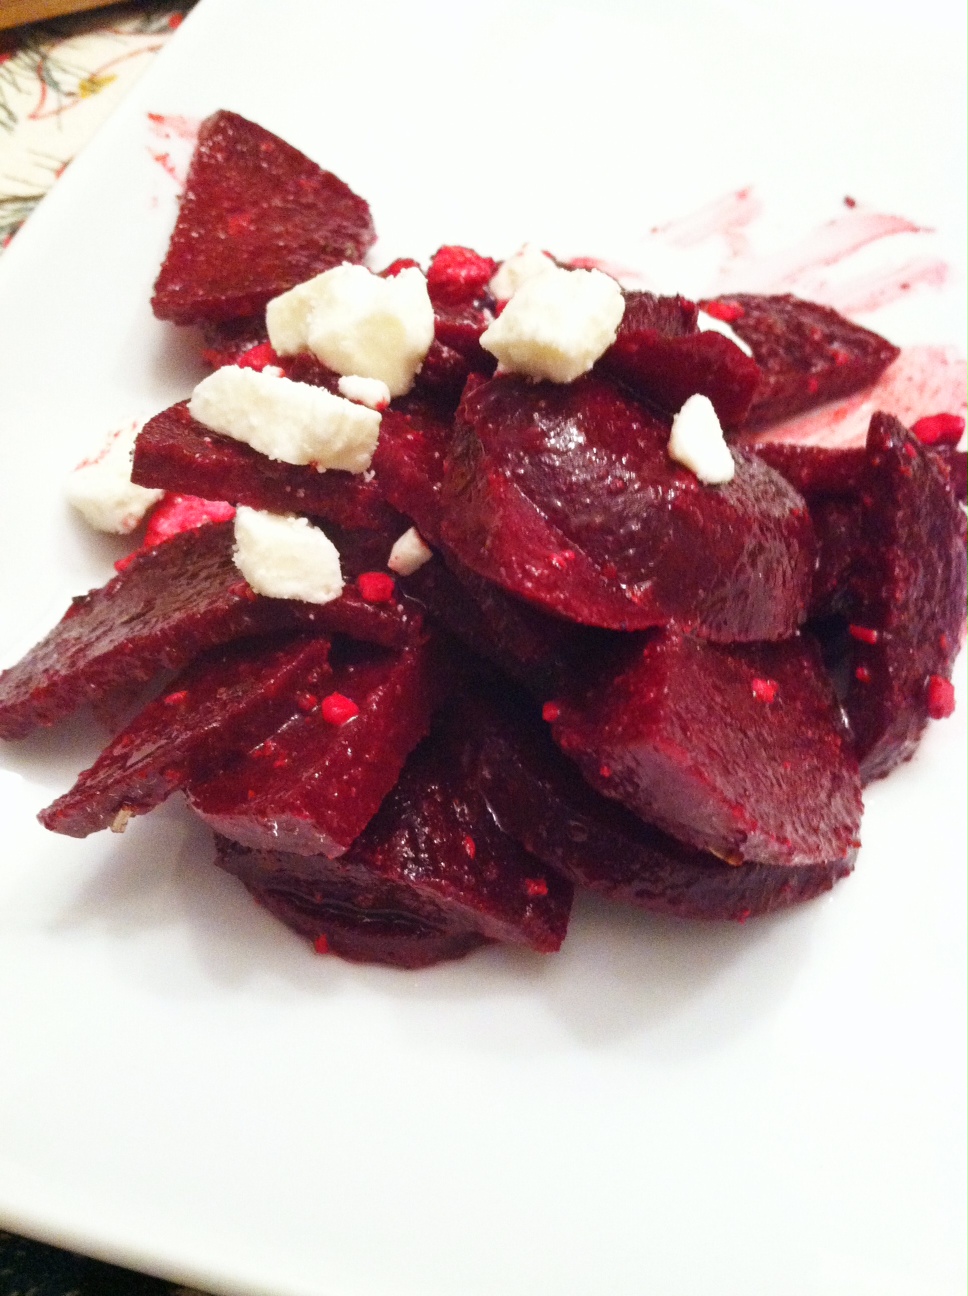
I just got a bunch of beets from the farmers market this past weekend, so beet salad with vinaigrette is not far away. This is by far my favorite beet recipe out there and a summer staple at our house.

Shrimp Ceviche
20130316-202832.jpg

Shrimp Ceviche is so fresh, light and healthy that it screams summer. Dish it out into martini glasses for a classy, but super easy app.

Summer Beef and Rice Skillet Casserole
beef skillet

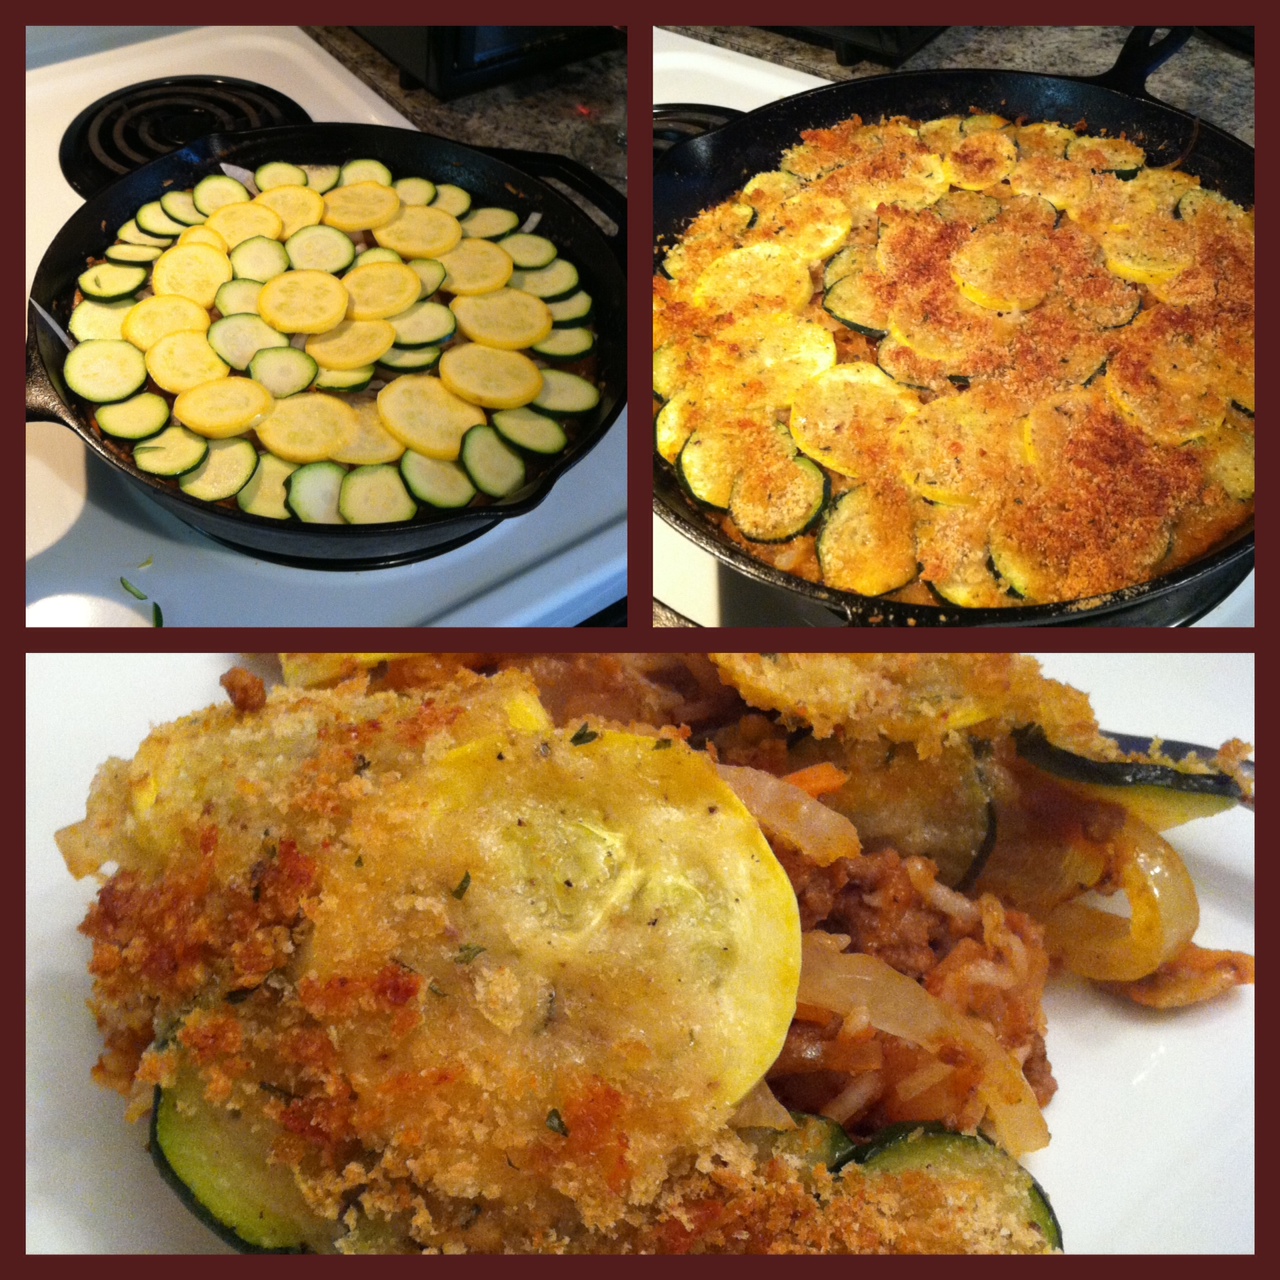
This recipe was great and I’m furious at myself for not making it this past summer between our epic move and living in two different states. This is a great way to use up all that squash and zucchini that presents itself mid to late summer. It’s also great for a family or for a small crowd. This summer, I’ll be making it as much as is reasonable and/or until my husband starts complaining.


OK! There are so many more recipes, many of which are summer seasonable, over on the RECIPES PAGE, but hopefully this gave you a good start. This is such an exciting time of year when things start to pop up and the options are endless, so don’t let it pass you by – get out to your local farmers market, farm stand or local grocery and BUY LOCAL and EAT FRESH!

Open Season

For locavores, June marks the beginning of open season. Markets open back up, farm stands are on every corner and fresh produce is back at last. This morning I woke up, threw some clothes on and told the husband to make my coffee to-go and hold off on frying the bacon. Half an hour later we were back home with new potatoes, kale, beets, green beans and fresh baked tomato basil rolls. And all for $15. But eating fresh and local? That’s priceless.

20140607-103632-38192149.jpg

Happy produce hunting, friends!!

Super Food: the case for sardines

We’ve all heard the term “super foods” being thrown around a lot lately – it seems there’s a new one every week. Something exotic, often expensive and difficult to find, but that without incorporating into your daily diet, you will most certainly die of a rare disease by your early 20’s. If you’re older than that, then you are actually already dead for lack of pomegranate seeds.

But today I want to make a case for a super food that’s a little less pedantic: the humble, lowly sardine.

Sardine Superfood

Sardine Superfood

The sardine is a super food for many reasons, but for me the primary reason is its accessibility and cost. A good tin of sardines is available at nearly every grocery store for less than $3. Sardines, which are actually not a type of fish, but rather a way of curing and packing fish, are often brisling – a small, Norwegian fish. These fish are packed full of Omega-3’s, which I’ve talked about before, but to review, Omega-3’s reduce inflammation in the body. Inflammation being a major source of illness from high blood pressure to heart disease, stroke, Alzheimer’s and more.  Omega-3’s are not something our bodies naturally produce – they must be consumed through diet. Yes, you can take a supplement, but remember supplements are meant to do just that – supplement a healthy diet, not replace it. In fact many vitamins and nutrients are not naturally absorbed by our bodies in pill or liquid form, such a calcium, which can only be absorbed if we are taking in the proper amount of Vitamin D through diet and outdoor exercise. I could go on here, but the point is – eat to be healthy, supplement if you must, but understand that food is always the best medicine when taken correctly.

In addition to being chock full of those Omegas, sardines are full of calcium – they are actually one of the highest non-dairy calcium foods around (because of their soft, edible bones, but don’t let that scare you away – I promise you do not notice the bones.) Sardines contain loads of protein, vitamin D and are sustainable (they’re not over-fished) and for those concerned about their fish intake – sardines have a lowest amount of mercury of just about any fish you can buy because they are at the bottom of the food chain. The bigger the fish, the higher the mercury level.

So here’s a great introductory recipe to sardines – Jeremy and I made this for breakfast on Sunday and it kept us full for HOURS. We didn’t eat again until 3pm that afternoon. And just one more note – sardines equal anchovies. Anchovies are smelly, oily and fishy. This doesn’t keep me from loving them, but if it keeps you from loving them, do not be scared of sardines – they are nothing alike except that they both come in a tin. Sardines are actually much more mild, like tuna.

Fisherman’s Breakfast

Fishermen's Breakfast

Ingredients:

  • 4-5 small red potatoes, cut into small cubes
  • 1 shallot, diced
  • 1 small bunch of parsley, chopped
  • 2 cloves of garlic, minced
  • 1 tin of sardines
  • 4 large eggs
  • salt and pepper
  • toast or bread

fisherman breakfast ingredients

Method:

  1. Preheat Oven to 500 degrees. Place an ovenproof dish into the oven for 5 minutes to pre-heat.
  2. Combine the diced potatoes, shallots, garlic, parsley and some salt and pepper in a small bowl, then from the an open tin of sardines, pour a teaspoon or so of the oil the sardines are packed in into the bowl. Mix to combine.
  3. Remove the dish from the oven, carefully, spray with nonstick cooking spray or oil and spread the potato shallot mixture into the bottom of the dish. Top the mixture with the sardines from the tin. Place back into the oven for 6 minutes.
  4. Remove the dish from oven and gently crack and pour all four eggs on top of the mixture. Season with more salt and pepper. Put back in the oven for 6-7 minutes until the white are set, but yolks are still a bit jiggly.
  5. Remove dish from oven and let sit for 2-3 minutes to let the eggs set. Serve with bread or toast and extra pepper.serve with crusty bread or toast

Figgy bruschetta

Toast slices of French bread at 375 for a few minutes until they are just lightly toasted. Remove from oven and top each slice with a thin slice of Brie. Spread the Brie gently as not to tear the bread. Top the Brie with a thin slice of prosciutto and quartered fresh figs. Return to the oven and toast until cheese is soft and beginning to melt. Remove from oven and drizzle with balsamic glaze.

20130815-195730.jpg

Pimento Cheese

Only in the south would someone throw together shredded cheddar cheese, mayonnaise and some pimentos and call it fancy. But that is, in fact, what we have done. Southerners have a way of doing this – cutting up cucumbers, mixing some dill with some mayonnaise and putting them on white bread and suddenly everything is elevated.

A week ago I was headed to a committee meeting that I chair that is putting together an amazing local food event called Farm to Fork. I wanted to bring something for people to snack on, so I dropped into local gourmet retailer, Taste, and picked up the biggest container of their homemade pimento cheese they had. Upon arriving at the meeting location, I found out that our host had made her own homemade pimento cheese (of course!) and that mine was not necessary, so home with me it went.

Now, what to do with a giant, half-pound container of pimento cheese? Traditionally this delightfully spicy, rich treat is spread on crackers for hors d’oeuvres or on white bread for sandwiches that are perfect at the beach or for a picnic, but there’s only so much of that you can do before you’re over it, so I started brainstorming and the answer came to me that weekend as Jeremy and I put together our traditional Sunday breakfast of eggs, bacon, grits, toast, jam, coffee coffee coffee. PIMENTO CHEESE GRITS. Duh. I mean, seriously.

Oh the beauty of Sunday breakfast

Oh the beauty of Sunday breakfast

I’d like to think I invented this, however a brief googling of such shows that I am actually a little late to the game. But nonetheless, it was new to us and totally amazing.

All you do is make your grits as usual, then at the end, add in the amount of pimento cheese you like and add a little milk to cream it in. I like to serve my grits with a farm-fresh, over-easy egg on top, so that when you crack your egg open, this happens:

*drooooool*

*drooooool*

and you have to keep yourself from just sticking your face right into the bowl.

With a few crispy pieces of bacon, some whole wheat bread slathered with homemade jam from Jeremy’s Aunt Liz and all the coffee you can drink. I just…I can’t…it’s too much.

SO let’s say you don’t live near one of the six Taste locations (poor you, you should really move to Hampton Roads), and you want to make your own Pimento Cheese? Well, my friends, you’re in luck because it’s literally the easiest thing you’ll ever make:

Pimento Cheese

pimento cheese up close

Ingredients

  • 1 (8-ounce) package shredded sharp Cheddar
  • 1 (8-ounce) package shredded extra-sharp Cheddar
  • 1 (4-ounce) jar pimientos, with juice
  • 1/4 cup mayonnaise
  • Salt and pepper

Directions

  1. Mix the shredded cheeses together with the pimientos and their juice. Stir in the mayonnaise until well blended. Add salt and pepper, to taste, and stir. Keep covered in the refrigerator until ready to use. It is easier to spread if left on the counter for 30 minutes before serving. Great on bread, celery sticks, or crackers.

Recipe credit to the Food Network

Yes, this is a Paula Deen recipe. Look, for better or worse statements, love her or hate her, if anyone is going to tell you how to make Pimento Cheese, it’s that lady. Period. Because in the south, “fancy” is sometimes just a spoonful of mayonnaise (or a stick of butter) away.

Dried strawberries

It’s strawberry season in Hampton Roads, and that is major. We love our strawberries around here. Every city in the region that has farms has pick-your-own strawberry fields and it’s a tradition for kids and adults alike to pick strawberries on field trips or on Mother’s Day or Memorial Day weekend when Virginia Beach hosts the Strawberry Festival.

Last week I got an email from a farm saying that they had so many berries in their field that they were going to be offering pick your own berries for $1.25/lb. That is unheard of. You would never ever find berries that cheap in the grocery store. So after sharing it with the Buy Fresh Buy Local Facebook fans, I got in the car and headed to the farm, which thankfully, is only about 10 minutes from my house. Yeah, it was a week day. Yeah, I had a lot of work to do, but sometimes you just have to get up and go pick strawberries. All that work will be there for you when you get back, I promise.

If you’ve never picked strawberries, it’s very easy – they are literally low hanging fruit. When they’re ripe, they get so heavy they just sort of dangle below the leaves and pretty white flowers of their plant. And they pop right off their stems and get tossed right into your strawberry carrying device. The only issue is that if you have a bad back like I do, you may be in a bit of pain the next day (like I was), but that’s why you bring your kids – to do the hard work of bending over and finding the ripest strawberries. When picking, look for deep, red berries. Before plucking them off the plant, lift them up and make sure the underside isn’t white or green (unripe) or that it hasn’t been noshed on by any bugs.

Sometimes you just have to leave your desk and go pick strawberries.

Sometimes you just have to leave your desk and go pick strawberries.

So what to do with 10 lbs of berries once you get them home? Most people I know make strawberry bread, pie, muffins, etc etc. We all know how I feel about baking, so I do one of (or all of) three different thing:

1. Eat them. Duh.

2. Freeze them. Rinse and dry the berries, cut off the caps and then halve each berry and lay in a single layer on a baking sheet. Place the sheet in the freezer for several hours, then put the berries into a freezer ziploc bag. Pull out what you need, when you need it. I freeze pounds and pounds of berries like this every year to use in my smoothies all year long.

3. Dry them. Dried berries are sort of like craisins – tart, but still a little sweet. Perfect in salads, on yogurt or oatmeal, granola, etc. Wash and dry the berries, cut off the caps and halve each berry. Lay in a single layer on a baking sheet and bake at 210 degrees for 3 hours. Let them cool completely, then store in an airtight container in the fridge OR you could freeze these also and just thaw them as you need them. I’m not sure exactly how long they’ll keep in the fridge….you’ve probably got about a week?

Dried Strawberries

Dried Strawberries

Strawberries are pretty amazing little fruits. One cup of berries has only 49 calories and almost 150% of your daily Vitamin C. They also have fiber and protein and good amounts of folates and potassium as well as manganese.

So get out there and pick some today. Or, make your kids do it. Also, can I borrow your kids for an afternoon?

Kefir

A few weeks ago I saw an interesting item come up on my online local food co-op, Coastal Farms. Jen Vaughan, of Vaughan Farms Produce, had posted that she had some extra kefir grains, and was selling them, along with a mason jar and some instructions on what to do with them.  I was intrigued, so I did a little research and it turns out that kefir grains are not actually grains, but rather a symbiotic culture of yeast and bacteria. Yummy! When brewed, they ferment (just like beer or wine) and create an active probiotic culture (just like yogurt). Kefir is probably most well known as a yogurt type of product or kefir milk, but it turns out you can also brew kefir into “kefir water” which is sort of a sparkling-like fermented beverage. The fizziness of it comes from the fermentation and can be adjusted based on how much air is allowed in during the process. The whole process and product is very similar to Kombucha, which is probably a little more well recognized.

Kefir grains and my first kefir water batch

Kefir grains and my first kefir water batch

I ordered my first batch and got to brewing! Jen had a few great suggestions for recipes to give the water flavor. Plain kefir water isn’t exactly delicious, so it’s recommended that you mix it with flavorings, which can range from green tea to juice to vanilla extract, depending on how you want it to taste. For my first batch I did a green tea flavoring, then I followed that with a cream soda style flavor and now I am on to a citrusy grapefruit juice. The process is simple:

1. Dissolve 1/4 cup of raw, brown sugar (I’m using raw demerara sugar) in 1 quart of distilled water (or spring or mineral water, according to the interwebs) in a container with a lid (I used the 1 quart mason jar Jen provided). Make sure the water is room temp and not hot – that will kill the grains. Drop in a raisin or two (they will be your ‘tell’) and a lemon slice if you have one (helps with the Ph). Put in three tablespoons of kefir grains. Put the container with the lid just set on top – not screwed on, in a warm place out of direct sunlight. For me, this was on top of my fridge.

2. When the raisins have floated to the top of the water, usually 2-3 days, the water is done “brewing.” Remove the lemon slice and raisins, then strain the water through a fine sieve. Here’s the trick – kefir doesn’t like metal – you have to use glass or plastic or in my case, I just put a paper towel on my metal sieve and strain it that way. Cheesecloth would also work, if I could find it anywhere, ever. Put your kefir grains back into your mason jar or container and start again with 1 quart of water and 1/4 cup of sugar, raisins, lemon, etc – the grains can pretty much be brewed indefinitely.

I strain the kefir through a paper towel lined sieve since metal can kill the grains

I strain the kefir through a paper towel lined sieve since metal can kill the grains


3. Take your strained kefir water and add your preferred flavorings. Here is what I’ve tried:

  • 1 part very strongly brewed green tea to 1 part kefir water.
  • 1 tbs vanilla extract and an extra 1/4 cup raw sugar (creates a cream soda style water)
  • 1 part grapefruit juice to 1 part kefir water, one sliced lemon, one sliced lime

Once you’ve added your flavors, put it through a second fermentation – so put it back in another container with a lid just resting on top in a warm place out of sunlight for about 2 more days. At this point, if you’ve added things (like lemon and lime slices) strain it again and then bottle it up and put it in the fridge. The water will last as long as whatever you’ve brewed it with would. So however long you’d leave a pitcher of brewed tea in your fridge is how long you can leave the kefir water brew in there and it will be fine. Keep repeating the process with your other fermenting batch and you can have indefinite kefir water!

my first taste!

my first taste!

There are innumerable ways to prepare and brew your kefir water and also tons of sites online where you can purchase the grains. I found this site particularly helpful: http://www.culturesforhealth.com/water-kefir-frequently-asked-questions-faq

I have noticed that since I’ve been drinking the water every day, my stomach issues have decreased some. It’s like I’m drinking my probiotic pills (which I also continue to take) and it certainly can’t hurt to get as much good bacteria going as possible. If you suffer from any kind of intestinal issues, or even if you don’t – I would really recommend giving this a try. The fizziness is nice without being too much (I hate soda and carbonated beverages, but this is the perfect amount of fizz for me), and the flexibility of flavorings is really nice. And because the grains basically feed on the sugar in the brewing process, the overall sugar content of kefir water is much, much lower than you would imagine based on how much you put in at the beginning. According to CulturesforHealth.com “approximately 20% of the sugar you start with will remain following a 48- hour culturing process and almost all that sugar will have been converted to fructose from its original glucose-fructose state.  Therefore if you use our recommend ratio of 1/4 cup sugar to 1 quart water, the finished kefir will contain approximately 1.4% fructose.” That’s pretty low – much lower than fruit juice, juice cocktails and certainly less than soda.

So give something different a try! Love the good bacteria!

strained kefir grains

strained kefir grains

Pantry Raid – Part III

I’m a little bit obsessed with Alton Brown and his show, Good Eats. I have the first two volumes of his Good Eats cookbooks, some DVDs and have seen almost every episode of the show. It’s kind of weird because in many ways, we are completely different cooks. Besides the fact that he is a famous chef and genius….he’s very precise and particular about the way his recipes are made and I’m . . . not. But something about his knowledge base and educational and visual illustrations of how cooking actually works is fascinating to me. After watching a show about cookies you feel like you just finished a course at Le Cordon Bleu….in a good way.

Anyways, he has a recipe for his own chili powder and “cowboy style” chili. This is the kind of chili that was really made out on the range – without beans or corn or potatoes or a lot of fluff. Just meat, stewed with chilies and tomatoes. I made this recipe for the first time a year or so ago, and because I wanted to make my own chili powder, like he does for his, I purchased two different kinds of dried chilies. Not the kind he suggested, because I couldn’t find them, and I’m not a perfectionist like him, but they were similar enough. The problem is, these bags of dried chilies (found in the “International” aisle of your grocery store) are HUGE. You only need about 9-12 chilies to make your powder, which leaves you with about 300 chilies. So, I decided I just needed to make this chili or at least my own chili powder, more often. The truth is, chili powder that is pre-bottled at the grocery store doesn’t really taste like much. It’s usually not very spicy and even if it is, it can lose its flavor quickly. This chili powder is pretty easy to make, and is incredibly flavorful and can be as spicy as you want it, depending on the chilies you use.

AB’s Chili Powder

Dried Chilies

Dried Chilies

Yield: approximately 3/4 cup

Ingredients

  • 3 ancho chiles, stemmed, seeded and sliced
  • 3 cascabel chiles, stemmed, seeded and sliced
  • 3 dried arbol chiles, stemmed, seeded and sliced
  • 2 tablespoons whole cumin seeds
  • 2 tablespoons garlic powder
  • 1 tablespoon dried oregano
  • 1 teaspoon smoked paprika

Directions

  1. Place all of the chiles and the cumin into a medium nonstick saute pan or cast iron skillet over medium-high heat. Cook, moving the pan around constantly, until you begin to smell the cumin toasting, approximately 4 to 5 minutes. Set aside and cool completely.
  2. Once cool, place the chiles and cumin into the carafe of a blender along with the garlic powder, oregano, and paprika. Process until a fine powder is formed. Allow the powder to settle for at least a minute before removing the lid of the carafe. Store in an airtight container for up to 6 months.

I used six Guajillo chilies and three Japones. Usually the bags rate the chilies in spiciness on a 5 chili scale, so you can just purchase whatever heat intensity you prefer.

Once you have your chili powder made, you’re read to make the actual chili. His original recipe calls for a pressure cooker, but you can use a Dutch Oven, it will just take a bit longer. The instructions below are for using a large, cast iron Dutch oven.

AB’s Cowboy Chili

Cowboy Chili

Cowboy Chili

Ingredients

  • 3 pounds stew meat (beef, pork, and/or lamb)
  • 2 teaspoons peanut oil
  • 1 1/2 teaspoons kosher salt
  • 1 (12-ounce) bottle of beer, preferably a medium ale
  • 1 (16-ounce) container salsa
  • 30 tortilla chips
  • 2 chipotle peppers canned in adobo sauce, chopped
  • 1 tablespoon adobo sauce (from the chipotle peppers in adobo)
  • 1 tablespoon tomato paste
  • 1 tablespoon chili powder
  • 1 teaspoon ground cumin

Directions

  1. Place the meat in a large mixing bowl and toss with the peanut oil and salt. Set aside.
  2. Heat a large, cast iron Dutch Oven over high heat until hot. Add the meat in 3 or 4 batches and brown on all sides, approximately 2 minutes per batch. Once each batch is browned, place the meat in a clean large bowl.
  3. Once all of the meat is browned, add the beer to the pot to deglaze the pot.
  4. Scrape the browned bits from the bottom of the pot. Add the meat back in along with the salsa, tortilla chips, chipotle peppers, adobo sauce, tomato paste, chili powder, and ground cumin and stir to combine. Put the lid on top and put into a 375 degree oven for two hours, stirring every thirty minutes. Serve with preferred toppings.
Cowboy Chili

Mmmmm…..chili

This recipe helped me use up a few things in my cabinet: the chilies for the chili powder, some left-over taco shells, which I crushed and used in place of the tortilla chips, a batch of homemade salsa that had been in the freezer since the summer and some chipotle peppers/adobo I had saved in the freezer. I need these more often than you’d think, but I always only need one or two at a time and usually one small can has about 5 or 6 and cost like $3. No point in wasting them – just freeze the remainder of the can and use at will. I also used local, grass-fed beef from Windhaven Farms which, of course, was delicious. Their “stew beef” pack was the perfect type of beef for this.

This chili is serious. It’s not your average American beans and corn and relatively mild type of thing. And don’t get me wrong – I love those kinds of chilis also, but if you want something really hearty and really filling and really classic, this is the way to go. I topped mine with plain, nonfat Greek yogurt (in place of sour cream), sliced green onions and cilantro. Chopped onions would also be nice, or a wedge of lime, or cheese if you want to go all out, although AB swears the only acceptable toppings are onions and cilantro. But again, I’m no perfectionist . . .