A few weeks ago I saw an interesting item come up on my online local food co-op, Coastal Farms. Jen Vaughan, of Vaughan Farms Produce, had posted that she had some extra kefir grains, and was selling them, along with a mason jar and some instructions on what to do with them. I was intrigued, so I did a little research and it turns out that kefir grains are not actually grains, but rather a symbiotic culture of yeast and bacteria. Yummy! When brewed, they ferment (just like beer or wine) and create an active probiotic culture (just like yogurt). Kefir is probably most well known as a yogurt type of product or kefir milk, but it turns out you can also brew kefir into “kefir water” which is sort of a sparkling-like fermented beverage. The fizziness of it comes from the fermentation and can be adjusted based on how much air is allowed in during the process. The whole process and product is very similar to Kombucha, which is probably a little more well recognized.

Kefir grains and my first kefir water batch
I ordered my first batch and got to brewing! Jen had a few great suggestions for recipes to give the water flavor. Plain kefir water isn’t exactly delicious, so it’s recommended that you mix it with flavorings, which can range from green tea to juice to vanilla extract, depending on how you want it to taste. For my first batch I did a green tea flavoring, then I followed that with a cream soda style flavor and now I am on to a citrusy grapefruit juice. The process is simple:
1. Dissolve 1/4 cup of raw, brown sugar (I’m using raw demerara sugar) in 1 quart of distilled water (or spring or mineral water, according to the interwebs) in a container with a lid (I used the 1 quart mason jar Jen provided). Make sure the water is room temp and not hot – that will kill the grains. Drop in a raisin or two (they will be your ‘tell’) and a lemon slice if you have one (helps with the Ph). Put in three tablespoons of kefir grains. Put the container with the lid just set on top – not screwed on, in a warm place out of direct sunlight. For me, this was on top of my fridge.
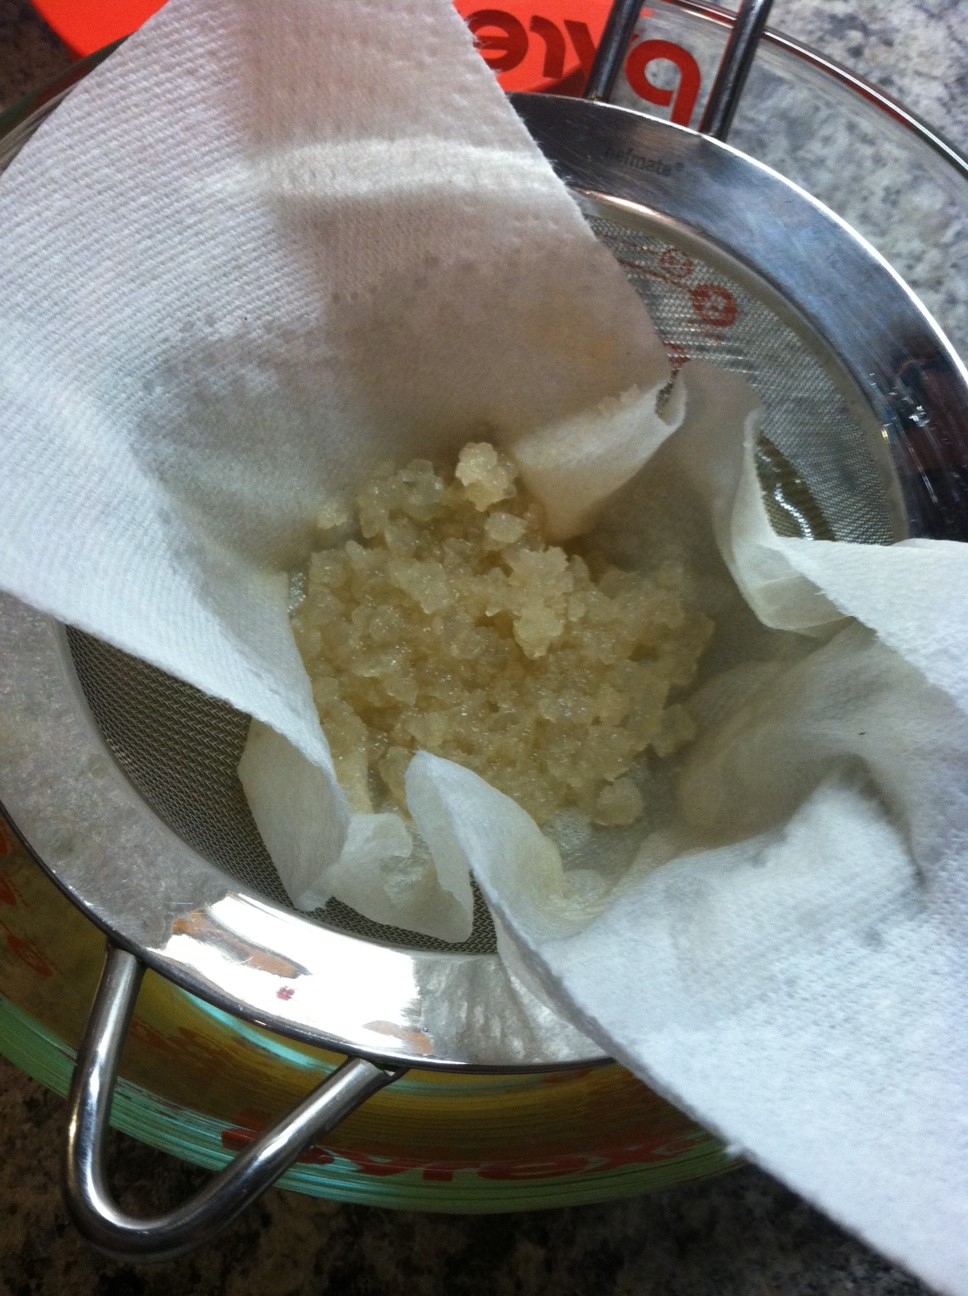
2. When the raisins have floated to the top of the water, usually 2-3 days, the water is done “brewing.” Remove the lemon slice and raisins, then strain the water through a fine sieve. Here’s the trick – kefir doesn’t like metal – you have to use glass or plastic or in my case, I just put a paper towel on my metal sieve and strain it that way. Cheesecloth would also work, if I could find it anywhere, ever. Put your kefir grains back into your mason jar or container and start again with 1 quart of water and 1/4 cup of sugar, raisins, lemon, etc – the grains can pretty much be brewed indefinitely.

I strain the kefir through a paper towel lined sieve since metal can kill the grains
3. Take your strained kefir water and add your preferred flavorings. Here is what I’ve tried:
- 1 part very strongly brewed green tea to 1 part kefir water.
- 1 tbs vanilla extract and an extra 1/4 cup raw sugar (creates a cream soda style water)
- 1 part grapefruit juice to 1 part kefir water, one sliced lemon, one sliced lime
Once you’ve added your flavors, put it through a second fermentation – so put it back in another container with a lid just resting on top in a warm place out of sunlight for about 2 more days. At this point, if you’ve added things (like lemon and lime slices) strain it again and then bottle it up and put it in the fridge. The water will last as long as whatever you’ve brewed it with would. So however long you’d leave a pitcher of brewed tea in your fridge is how long you can leave the kefir water brew in there and it will be fine. Keep repeating the process with your other fermenting batch and you can have indefinite kefir water!

my first taste!
There are innumerable ways to prepare and brew your kefir water and also tons of sites online where you can purchase the grains. I found this site particularly helpful: http://www.culturesforhealth.com/water-kefir-frequently-asked-questions-faq
I have noticed that since I’ve been drinking the water every day, my stomach issues have decreased some. It’s like I’m drinking my probiotic pills (which I also continue to take) and it certainly can’t hurt to get as much good bacteria going as possible. If you suffer from any kind of intestinal issues, or even if you don’t – I would really recommend giving this a try. The fizziness is nice without being too much (I hate soda and carbonated beverages, but this is the perfect amount of fizz for me), and the flexibility of flavorings is really nice. And because the grains basically feed on the sugar in the brewing process, the overall sugar content of kefir water is much, much lower than you would imagine based on how much you put in at the beginning. According to CulturesforHealth.com “approximately 20% of the sugar you start with will remain following a 48- hour culturing process and almost all that sugar will have been converted to fructose from its original glucose-fructose state. Therefore if you use our recommend ratio of 1/4 cup sugar to 1 quart water, the finished kefir will contain approximately 1.4% fructose.” That’s pretty low – much lower than fruit juice, juice cocktails and certainly less than soda.
So give something different a try! Love the good bacteria!
strained kefir grains