Like Father, Like Daughter

My dad makes this outrageous clam chowder that people will literally put in requests for. Sometimes in the winter my mom and dad will host an oyster roast at their house and my dad will steam oysters under a wet towel on the grill outside and we’ll stand around shucking them over plywood laid out on saw horses with big steaming bowls of this chowder. It is really culinary perfection – exactly the way I love to eat and experience food.

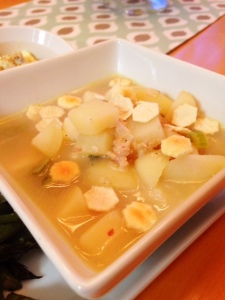
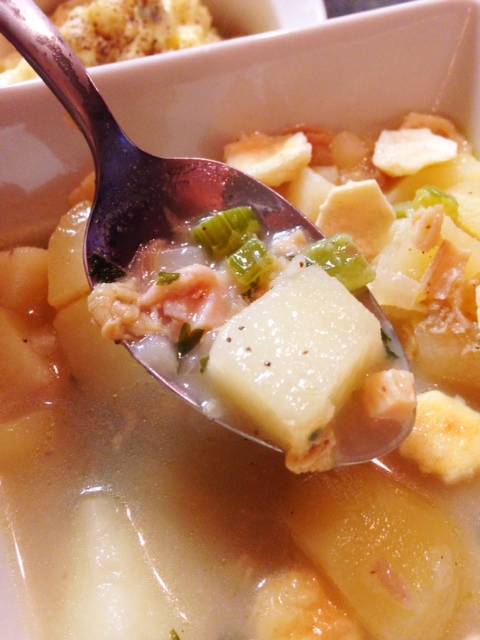
The chowder that he makes isn’t thick and creamy like up north, this is what we call “Hatteras Style” clam chowder and it’s really more of a soup than a chowder. It’s brothy, chunky and extremely peppery. For the longest time I assumed it was some sort of complicated recipe that I didn’t want to take on, until one night when I was pining for it, he said nonchalantly,  “all you need is a can of clams and some potatoes.” What?? Seriously??

Anyways, the simplicity of this recipe doesn’t make it any less amazing. Much like me, my dad doesn’t cook to a precise recipe, so these amounts were estimated by me until it looked and tasted similar to his. I will say, just when you think you’ve added enough pepper, add some more.

Bob’s Clam Chowder, Hatteras Style

Hatteras Style Clam Chowder

Ingredients:

  • 3 stalks of celery, diced
  • 1 medium onion, diced
  • 2 tbs butter
  • 4 medium red potatoes, diced
  • 2 small cans of chopped clams or 1 large can (depends on where you go – most grocery stores just carry the small, tuna can sized ones)
  • salt, pepper and parsley to taste

Method:

  1. Melt the butter in a large stock pot and add the onions and celery and saute until soft
  2. Add the potatoes, add salt and pepper and stir well
  3. Add both cans of clams – WITH juice, stir well
  4. Add 3 cups of water (or more depending on how brothy you want it)
  5. Bring to a boil, then down to a simmer for 15 minutes or until potatoes are easily pierced with a fork.
  6. Add more salt and pepper to taste. Serve steaming hot with oyster crackers

Hatteras Style Clam Chowder

This recipe makes about four hearty bowls. Double for more or triple for a crowd. At some stores you’ll be able to find the huge cans of chopped clams, which is probably worthwhile if you’re cooking for a small army.


Chili my way

We broke a record low overnight last night in Hampton Roads – 58 degrees. That is COLD for August in southeastern Virginia and when I woke up this morning and stepped out on the back porch, the instant the sub-60 degree temperate hit me, I knew we had to have chili for dinner. Does anyone else have these instantaneous food triggers? Jeremy will vouch for the fact that I CANNOT listen to mariachi music without immediately needing a taco. Like, if I hear it on TV or out in public I will literally stick my fingers in my ears and go “lalalalalala” if I think there’s any chance I can’t immediately acquire a taco. This is how I am with chili. I can go months and months without thinking about it and then a cool breeze will come out of somewhere or maybe someone is burning yard debris or ANYTHING that seems like fall and I cannot rest until there is chili.

As we all know there are about a billion ways to make and eat chili and everyone from every part of the country will swear that their way is the right/legitimate/original/best way to make it. Fine, sure. It is. But the truth is, MY WAY IS THE BEST WAY SO SHUT UP.

Rachel’s Chili

(eat it or get out)

chili bowl - rlb

Ingredients:

  • 1 lb of ground turkey
  • olive oil
  • one onion
  • two cloves of garlic, minced
  • one 15oz can of kidney beans, drained
  • one 15 oz can of chili beans, drained
  • one 14 oz can of tomato sauce (or home made)
  • one 14oz can of crushed tomatoes
  • one can of beer (minus two swigs for yourself)(actually, take three swigs)(just put in whatever is left)
  • 1/8 cup of chili powder
  • 1/2 tbs cumin
  • 1 tsp coriander, crushed
  • 1/2 tsp cayenne or hot sauce or more if you like it spicy

Optional Toppings:

  • diced onions
  • chopped cilantro
  • shredded cheese
  • lime wedges
  • sour cream or plan Greek yogurt
  • avocado slices
  • crushed tortilla chips
  • crushed saltines

Method:

  1. In a large skillet heat the oil, sautee the onion and the garlic until soft
  2. Add the turkey and cook until browned. Drain any excess fat.
  3. Put the turkey mixture and remaining ingredients into a slow cooker and cook on low for 8 hours OR put all ingredients into a Dutch oven and cook over low heat on the stovetop for 3 hours.

I prefer using a slow cooker with chili because chili is just one of those things that gets better the longer it sits. I would even recommend making this the day before you’re going to serve it (The Saturday before game day, maybe?) but for me it’s too hard to make it and not eat it the same day, but do whatever your internal fortitude allows you to do. You can see by my beer recommendations, that mine is incredibly low.

chili toppings

And of course there are the chili toppings! I like to lay them all out and let everyone decide what they want. My must haves are plain Greek yogurt and shredded cheese with a squeeze of lime. This is the one part I’ll let you decide for yourself what is best.


Pimento Cheese

Only in the south would someone throw together shredded cheddar cheese, mayonnaise and some pimentos and call it fancy. But that is, in fact, what we have done. Southerners have a way of doing this – cutting up cucumbers, mixing some dill with some mayonnaise and putting them on white bread and suddenly everything is elevated.

A week ago I was headed to a committee meeting that I chair that is putting together an amazing local food event called Farm to Fork. I wanted to bring something for people to snack on, so I dropped into local gourmet retailer, Taste, and picked up the biggest container of their homemade pimento cheese they had. Upon arriving at the meeting location, I found out that our host had made her own homemade pimento cheese (of course!) and that mine was not necessary, so home with me it went.

Now, what to do with a giant, half-pound container of pimento cheese? Traditionally this delightfully spicy, rich treat is spread on crackers for hors d’oeuvres or on white bread for sandwiches that are perfect at the beach or for a picnic, but there’s only so much of that you can do before you’re over it, so I started brainstorming and the answer came to me that weekend as Jeremy and I put together our traditional Sunday breakfast of eggs, bacon, grits, toast, jam, coffee coffee coffee. PIMENTO CHEESE GRITS. Duh. I mean, seriously.

Oh the beauty of Sunday breakfast

Oh the beauty of Sunday breakfast

I’d like to think I invented this, however a brief googling of such shows that I am actually a little late to the game. But nonetheless, it was new to us and totally amazing.

All you do is make your grits as usual, then at the end, add in the amount of pimento cheese you like and add a little milk to cream it in. I like to serve my grits with a farm-fresh, over-easy egg on top, so that when you crack your egg open, this happens:

*drooooool*

*drooooool*

and you have to keep yourself from just sticking your face right into the bowl.

With a few crispy pieces of bacon, some whole wheat bread slathered with homemade jam from Jeremy’s Aunt Liz and all the coffee you can drink. I just…I can’t…it’s too much.

SO let’s say you don’t live near one of the six Taste locations (poor you, you should really move to Hampton Roads), and you want to make your own Pimento Cheese? Well, my friends, you’re in luck because it’s literally the easiest thing you’ll ever make:

Pimento Cheese

pimento cheese up close

Ingredients

  • 1 (8-ounce) package shredded sharp Cheddar
  • 1 (8-ounce) package shredded extra-sharp Cheddar
  • 1 (4-ounce) jar pimientos, with juice
  • 1/4 cup mayonnaise
  • Salt and pepper

Directions

  1. Mix the shredded cheeses together with the pimientos and their juice. Stir in the mayonnaise until well blended. Add salt and pepper, to taste, and stir. Keep covered in the refrigerator until ready to use. It is easier to spread if left on the counter for 30 minutes before serving. Great on bread, celery sticks, or crackers.

Recipe credit to the Food Network

Yes, this is a Paula Deen recipe. Look, for better or worse statements, love her or hate her, if anyone is going to tell you how to make Pimento Cheese, it’s that lady. Period. Because in the south, “fancy” is sometimes just a spoonful of mayonnaise (or a stick of butter) away.

the other green

I was reading a story in Edible Piedmont this morning about a kale recipe, which could also be made with collards. The author made this substitution because she said she knew how popular collards are in eastern North Carolina, so much so that the region has been referred to as “The Collard Belt.” I’ll take it. But I’ll also take kale. Any day of the week. I think it’s actually a bit more palatable to the general population than collards and is usually cooked in more various ways.

I know it’s sort of cliche to have a food blog and regale the benefits of kale. Everyone gets it, I know. Kale is great, it’s good for you, it’s a super food, put it in your smoothies, bake it into cookies, blah blah blah. But seriously. It’s great. So great that I highlighted one of my favorite kale recipes in my January column in Tidewater WomenThe column this month is about resolving to “Live Locally” and what that means, how it benefits not only you personally, but your community as a whole. I also put it in there to remind people that local food isn’t in hibernation during the winter months. It’s readily available, if you’re willing to look for it, and to try something you might not otherwise try (ie – kale. or chard. or other things that are green and look like dinosaur food.) Not wanting to be a hypocrite, I went out yesterday, tracked down some kale and made this recipe, which I share with you below. It really is a great recipe, especially for the new year, if (like me) you are trying to drop a few “party pounds” from the holidays….this meal is so packed with protein that after only half a bowl you’ll feel completely full. It’s also so lo-cal and healthy that even if you down all four servings in one night, there’s really nothing to feel guilty about. Except for the amount of flatulence you will inevitably plague your family with if you decide to do that. ANYWAYS.

I found this kale at a little roadside stand out in front of somebody’s house. These are my favorite places to shop because it’s fresh, you’re helping support someone’s backyard gardening habit, and the produce is usually dirt cheap. I got a pound of kale and a dozen fresh, free-range eggs for $4. I could also have scored 4 lbs of sweet potatoes for a dollar if I’d liked. Keep an eye out for these stands in your neighborhood or town. And don’t feel shy or weird about driving up to them. The people who set them out are usually so nice and happy to have a customer. The chicken came from a Crock Pot Chicken I’d made earlier in the week. This was one of three meals I got out of one five pound chicken. The only change I make in this recipe is that I use dried lentils that I cook and season myself. I’ve never been able to find canned lentils in my grocery stores, but if your store has them – more power to you. If you go this route, use half the bag (1/2 lb) – not two whole cups of dried beans, as they will expand as they cook. 1/2 lb will give you just over two cups once cooked.

Shredded Chicken with Kale and Lentils

kale cooking

CAST IRON LOVE.

Ingredients:

  • 2 tablespoons extra-virgin olive oil
  • 1 small onion, finely chopped
  • 1 teaspoon fresh thyme leaves
  • Coarse salt and ground pepper
  • 2 bunches kale, tough stems removed, torn into bite-size pieces
  • 2 cups lentils (from a 15.5-ounce can), drained and rinsed
  • 2 cups shredded cooked skinless chicken breasts
  • Lemon wedges, for serving

Method:

  1. In a large skillet, heat 1 tablespoon oil over medium heat. Add onion and thyme; season with salt and pepper. Cook, stirring occasionally, until onion is softened, about 5 minutes.
  2. Add kale and cook, stirring occasionally, until kale is wilted and tender, 4 to 6 minutes. Transfer to a medium bowl.
  3. Add 1 tablespoon oil and lentils to skillet; season with salt and pepper. Cook, stirring, until warmed through, about 20 seconds. Transfer to bowl with kale, toss to combine, and divide among four bowls. Top with chicken and squeeze lemon over top. Serves 4.
Shredded chicken with kale and lentils

Shredded chicken with kale and lentils

I agree with what you’re thinking – this looks like a recipe you see in those magazines all about getting fit with advertisements for muscle milk supplements. But honestly, it doesn’t taste like that. It tastes yummy AND healthy, which is possible, I promise. Jeremy even got seconds. Flatulence be damned!


New Year: Two Ways

If you’re from the North, Midwest or you’re Polish or German then for you New Years probably means sauerkraut and pork, for good luck. If you’re from the south, it’s “hopping johnnies” or black eyed peas. Other parts of the country and world eat grapes, fish or special cakes to bring luck and prosperity for the new year.  Since Jeremy’s background is Midwestern German and Polish and my background is ….. southern, it’s always a toss up about what to eat each new year, so this year we did both. Obviously.

On new year’s eve, before we headed out for a fun night with friends, I grilled up some kielbasa, made a traditional German Potato Salad and served it all with Amish-made sauerkraut and spicy brown mustard. This is the kind of food I didn’t even know about as a kid, and I’m so glad I’ve been introduced to it through Jeremy and his family. That potato salad is on point – click above for the recipe.

Na zda-ró-vye!

Na zda-ró-vye!

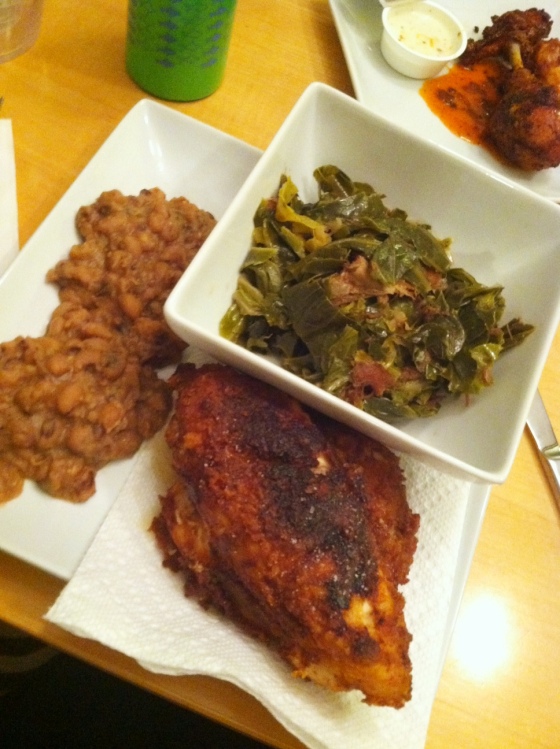
Then on New Years day, we had Alton Brown’s Skillet Fried Chicken with black eyed peas and collard greens. This year I made my black eyed peas in the slow cooker, which eliminated any soaking time you would normally need to make dried beans. All I did was sort and rinse 1 lb of beans, throw them into the slow cooker with 6 cups of water and my seasoning and let them cook on low for 8 hours (or high for 4). I cooked up some bacon, onion, and garlic, which I added to the cooker along with a healthy dose of pepper. They were great this way and so much easier. I wish black eyed peas were prettier in pictures, but they’re just not. Oh well, they are still delicious.

not pretty, but tasty.

not pretty, but tasty.

This has "lucky" written all over it.

This has “lucky” written all over it.

I hope you all had a safe and wonderful new year’s, and I’m looking forward to sharing more recipes, tips, and total failures with you in 2013. Happy It’s Not the Holidays Anymore!!!

What are your new year traditions? What foods do you hope will make you lucky and prosperous?

The root of it all

I just gave myself an award for the most clever blog title ever.

i ❤ beets

It is a shame, I realized, that this blog’s namesake has never really been examined thoroughly. I think in my very first blog post I may have posted a picture of a beet dish I had done, but I’ve never really delved into this amazing little root that inspired me to make this blog. There are a few reasons that beets are the thing I happen to heart. They are available locally, they are available at several times throughout the year and many people don’t like them. Why is that a reason to make beets the central theme of a blog? Because I think I can change people’s minds. I think a lot of foods out there that deserve our attention but suffer general distaste have just been presented wrong all this time. Like the poor Brussels sprout, which I will post about later . . .

Take, for instance, my husband who insisted he hated beets. So I asked in what format he had experienced beets in the past and he said either canned, pickled or boiled to death. Well, no wonder. He also hated Brussels sprouts for similar reasons. But there is a simple answer to both of these food fears and it is this: roasting. Roasting, which uses dry, indirect and diffused heat (such as an oven) increases flavor by caramelization and the Maillard browning reaction. Essentially, roasting enhances the sugars in foods through a process called pyrolysis, which I will not get into, because I barely passed chemistry. But here is what I do know: it makes food delicious. Especially foods like beets, which already have a high natural sugar content, just waiting to be released.

Beets are also so nutritious. Here are some facts from Nutrition and You about beets:

  • Beets are a rich source of phytochemical compound, glycine betaine. Betaine has the  property of lowering homocysteine levels within the blood. Homocysteine, a highly toxic metabolite, promotes platelet clot as well as atherosclerotic-plaque formation, which, otherwise, can be harmful to blood vessels. High levels of homocysteine in the blood result in the development of coronary heart disease (CHD), stroke and peripheral vascular diseases.
  • They are also a rich source of B-complex vitamins such as niacin (B-3), pantothenic acid (B-5), pyridoxine (B-6) and minerals such as iron, manganese, copper, and magnesium.
  • The root has very good levels of potassium. 100 g fresh root has 325 mg of potassium or 7% of daily requirements. Potassium lowers heart rate and regulates metabolism inside the cells by countering detrimental effects of sodium.

And while us die-hard beet fans can eat a beet canned, pickled, boiled, grilled or anything else, for those skeptics out here, this is my GO-TO beet recipe. I’m not sure where it originated from…I think a friend may have suggested this method and I’ve just sort of made it my own over time, I’m not really sure. My hope is that you will love it enough to make it your own, adding, subtracting and substituting to your liking.

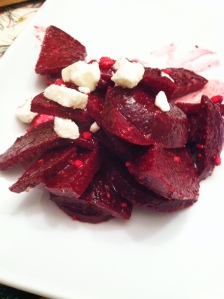
Roasted Beet Salad with Vinaigrette

Ingredients: Beets in vinaigrette

  • One bunch beets (as seen above)
  • 3 tbs olive oil
  • 1 tbs vinegar of your choice (balsamiq, red wine, champagne, whatever you like)
  • 1 shallot, finely diced
  • 1 tbs dried herbs (Italian, Herbs de Provence, fresh or powdered garlic or whatever else you’d like)
  • Salt and Pepper to taste
  • 1 cup crumbled feta cheese

Method:

  1. Pre-heat oven to 375 Fahrenheit. Cut the beets off their stems and trim off the tops and the “tails” of each beet. Clean each beet so they are free of dirt. Wrap each beet in individually in tin foil and place in the pre-heated oven, directly on the center rack. Roast for 30-40 minutes, or until each beet is easily pierced with a knife. 
  2. While the beets are roasting, create your vinaigrette. The most important thing to remember here is the a vinaigrette dressing always 3 parts oil to 1 part vinegar. You can use any combination or any measurement (tsp, tbs, cup, etc), as long as you keep that ratio the same. Pour your oil, vinegar, shallots, herbs, salt and pepper into a medium sized bowl and whisk until they are emulsified. Set aside until beets have finished roasting.
  3. When beets are easily pierced with a knife, unwrap from tinfoil and allow to cool. Take an old dishtowel and peel the beet’s skin off with the towel – if it’s roasted to completion, the skin should slide off easily. Do this with each beet.
  4. Cut each beet in half or in quarters, if large, and cut into thin slices. Re-whisk your vinaigrette so it is well blended, then add your beets to the bowl and toss to coat. Plate, then top each serving with a spoonful of feta cheese.
Trim and wash beets

Trim and wash beets

A well emulsified vinaigrette

A well emulsified vinaigrette

Beets

After roasting, remove skin with a dish towel

Served with Greek salad, crusty French bread a Pinot Grigio.

Served with Greek salad, crusty French bread a Pinot Grigio.

If you don’t like beets like this, then I grant you the right to dislike beets. But before you file them away in things that are gross and that you refuse to eat, please try this recipe. Please. Give beets a chance.

Note: these beets were purchased from Westside Produce and Provisions where they were sourced from New Earth Farms in the Pungo area of Virginia Beach, where they use sustainable and organic growing methods. 

Slow Cooker BBQ

I’m from North Carolina so naturally I am a huge fan of Barbecue. And while you can’t beat hardwood smoked whole hog, for most of us that is not an option in our own kitchens (although I am still trying to convince Jeremy that there is room beside the hot tub in the backyard for a full-hog sized smoker).  But there is another option and it comes in the somewhat unexpected form of a slow cooker. Yea, there are some hard-core BBQ fans out there that will tell you that if it’s not cooked over a real hard wood fire then it’s not technically barbecue, and on some historical points I will agree with them, but for all intents and purposes this recipe gets the job done. But make no mistake – while you don’t have to cook a whole hog in a split metal garbage pail over a hickory fire, you do have to commit yourself to two days of cooking, although most of it is pretty hands-off. You also have to commit yourself to your house smelling like pork for two days. Something I do not mind at all, but which some of you may find displeasing.

Step 1: Purchase a pork shoulder. These are also often called pork picnics, or pork butts. I usually go for a 3-4 pounder because I’m not looking to cook for a huge crowd. Go bigger if you need to, just make sure it will still fit inside your slow cooker.

Step 2: The night before you want to eat the Q, put the shoulder into the crock pot with at least a liter of cola or as much as you need to just about cover it. You can use any kind of cola. I used Dr. Pepper, but I’ve also used R C Cola, Coke, Pepsi, whatever. Turn the cooker on low and let it sit overnight.

Step 3: In the morning, remove the pork from the cola, pour the cola out and wipe out your slow cooker crock. The pork will be falling apart, so make sure you get all the meat out before you toss the cola (IE- don’t throw the pork baby out with the bath water). Let the pork cool for a bit, then begin to remove as much of the fat as you can from the meat. This will require tearing the meat into large chunks. (See photo collage, upper right hand corner). Once you’ve gotten as much fat off as possible (and bones if you’ve purchased a bone-in shoulder), put the meat back into the crock pot and shred with two forks until you’ve reached the consistency and chunkiness you like. You can also chop the meat after it’s shredded if you like that texture better. Chopped vs. Pulled is a completely personal preference; the value of one over the other I will not weigh in on although many people have strong opinions here.
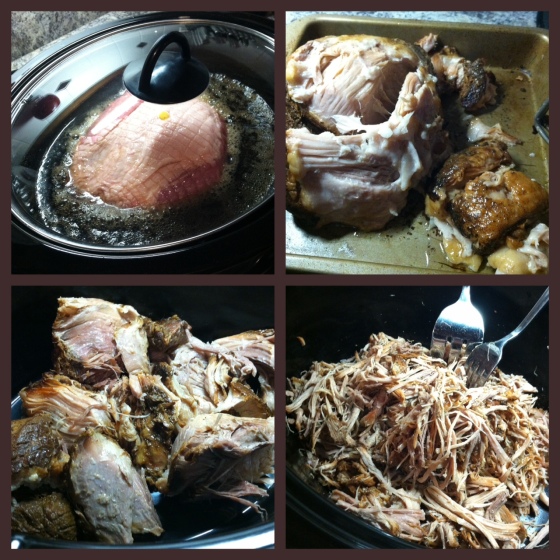
BBQ Collage

Step 4: Make your sauce. This is where personal preferences turn into regional BBQ wars. You are certainly welcome to go to the store, buy a pre-made jar of BBQ sauce and dump it onto your meat at this point. That is totally fine if you have a particular brand that you really enjoy. However, I have never ever ever purchased a sauce from the store that adequately represented real Eastern Carolina BBQ Sauce, so I make my own. I cannot even begin to give you real measurements of anything, but I will tell you it includes a little to a lot of the following things: apple cider vinegar, molasses, red pepper, black pepper, hot sauce, salt, garlic and onion powder, ketchup, and (secret ingredient alert!) liquid smoke. Yup. If you can’t cook it over real smoke and enjoy that hard-charred meat bark, liquid smoke will at least give you a hint of that flavor. The sauce I make looks something like this when I’m done:
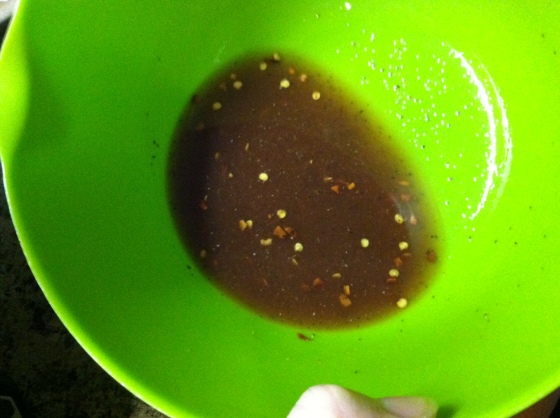
Eastern Carolina BBQ Sauce

Secret Sauce

Possibly not at all like the BBQ sauce you know and love. Again, this is very regional. If you love some KC Masterpiece, I’m not judging (yes I am), just use that instead and sauce it to your liking. It should look something like this, or like something completely different if you’re using a different kind of sauce:
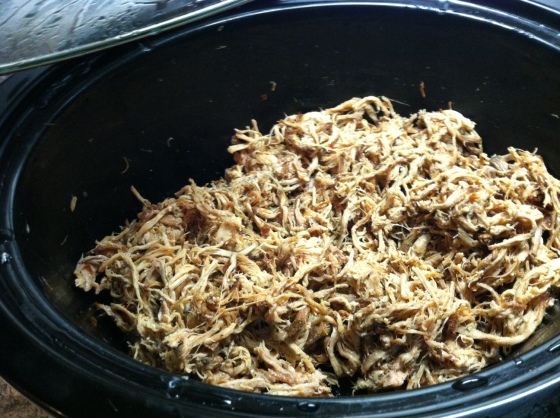
NC Style BBQ

This is what Eastern NC sauced BBQ looks like.

Step 5: Leave the meat in the crock pot with the sauce on low during the day. When you’re ready for dinner, check the meat, see if it needs any more sauce, then serve how you like. Again, this could be a multitude of ways, but I see no reason why you wouldn’t want it on a soft bun with home made coleslaw and a good dose of hot sauce:

BBQ Sandwich

Heaven.

I’ve taken this BBQ to several events and never get less than a dozen compliments on it. Even though it takes a good 20 hours, it’s worth it, and really is very very easy when you break it down. And the more you make it, the better you’ll learn how you like your sauce, or you’ll come up with other fun combinations. I’ve seen a recipe done like this but instead of BBQ sauce, a Cuban marinade was used, then the pork was made into Cuban sandwiches with ham and pickles and oh jeez, that’s going to have to be another blog . . .

What is your favorite kind of BBQ? Tennessee? Texas? Arkansas? Western NC? Let’s fight about it!

The one day of the year that everyone does what I want them to do

Thanksgiving gets the shaft and we all know it. Here is how the second half of the year’s calendar works:

September – Labor Day, back to school
October – Halloween
November, December, Most of January – out of control consumerism in the guise of a religious holiday we all know as CHRISTMAS

It doesn’t leave much room for a little altruistic holiday like Thanksgiving that focuses on being grateful for what we have instead of insistent that we get all the things the TV told us we need. Which is why I try my best to be a Thanksgiving cheerleader. It is, after all, the one day of the year that everyone collectively does this thing that I am constantly trying to convince people to do: get into your kitchen, cook a meal for people you love that is inspired by seasonal produce, then sit down at a table together and eat it slowly. Then, of course, the next day is the one day of the year where everyone does the one thing that actually makes me want to not be a part of the human race. The contrast between Thanksgiving and Black Friday could have been the socioeconomic topics of one of  George Orwell’s books had he lived long enough to see the monstrosity that is the biggest retail holiday of the year. Don’t get me wrong, I’m a free-market capitalist as much as the next gun-toting Libertarian, but there’s a right way and a wrong way to support the economy and we all vote with our dollars whether we vote for massive corporations who export jobs and manufacturing to China or whether we vote for small, locally-owned companies whose owners create jobs and reinvest those dollars back into our community . . . . but I digress.

THANKSGIVING!!

An Edible Arrangement, indeed.

Whether or not the traditional Thanksgiving story is true, and whether or not the things we eat each year really represent a traditional early-American harvest, the bottom line is that the meal is still a celebration of bounty, inspired by the local, the seasonal, the gracious things in life. And I love it. My personal family traditions have changed over the years. As a kid, our entire 30+ person extended family would all come to my parents’ house for Thanksgiving, so it was always a really big deal. We would get up early in the morning to help my mom set the house up for the influx of people, and then as the sun went down, people would start pouring in, and the whole evening was just complete bliss for me. I love my family so much and even though most of us lived next door to each other on the same dirt road, it was somewhat rare that we are all in one place at one time, so for me, it was like this amazing Thanksgiving miracle. And everyone could cook so damn good. There were usually at least 20 dishes spread out around the kitchen, everything from corn pudding to collards to stewed tomatoes (this is the south, after all) and of course the traditional turkey, ham, green bean casserole, mashed potatoes, etc.

As we’ve all grown up, the grandkids have gotten married and it’s harder to get everyone together at the same time, and so traditions have changed, and Jeremy and I usually spend every other Thanksgiving with his family in Ohio, which I also love and which includes a very different list of dishes like Galumpkis, Kielbasa and Pierogies (are you sensing that someone is Polish?) But the day itself and the meal is always the same: full of love and tradition and thankfulness and I am a complete sucker for that.

So in the spirit of Thanksgiving and with those big family dinners playing out in my mind, I share with you a recipe for genuine southern collard-greens (pronounced ‘collargreens’, no d, all one word). Please understand, though, that cooking up a mess of greens requires a tiny bit of know how and personal preference. This recipe is more of a guide. As you cook them more and more, you’ll figure out exactly how you like them.

Simply Southern Collard Greens

Serves 10, approximately

Ingredients:

  • 2 large bunch of collards, fresh and local if possible and cut directly at the base of the stem (pictures at right)

    If possible, get collards from the market or farm cut right at the base of the plant.

  • 1lb of bacon, fat back, ham, jowls, ham hock or any other kind of seasoning meat
  • 1/2 of a medium onion, diced
  • 2 garlic cloves, minced
  • 1/2 c. apple cider vinegar, plus more for serving
  • 1/2 tsp. baking soda
  • salt and pepper to taste
  • jalapenos (fresh or pickled) – *optional and to taste – no more than one whole jalapeno *
  • water, on hand

Method:

  1. Thoroughly rinse each individual leaf off the collard plant and then tear the thick rib/stem off each leaf.
  2. Roll leaves together like a cigar, then cut crosswise into strips. Do this with all the collard leaves.
  3. If you’re using any uncooked meat (such as bacon) but it in the bottom of a large, heavy stock pot and cook it over medium heat. Once it starts to release its fat, throw in the onions and garlic and saute it all together until cooked through
  4. Pour in the apple cider and use this to deglaze the bottom of your pot – scraping up the bacon and onion bits with a wooden spoon, let this reduce together for a few minutes
  5. Begin adding your strips of collards, one large handful at a time, to the vinegar/pork fat glaze (that sounds awesome, right?) and stir them in, letting them wilt before adding another handful
  6. Stir in the baking soda and pepper to taste (and jalapenos if you’ve chosen to do that) and begin adding water as needed (This is where the know-how and experience comes in. You don’t want them too soggy, but you don’t want them to burn. They’re just sort of stewing in the water bath, so add it as you need, but not too much). Really taste the collards before adding salt – the meat you’ve used generally makes them salty enough.
  7. At this point, you can continue to let them simmer and cook on low on the stove top, or you can transfer them to a crock pot and leave them on low for a few hours, or you could even just continue to cook the water down in small amounts in your pot , doing a braising method that would results in less “soggy” greens. It’s totally up to you, I’ve done it every which way, depending on what I want and how much time I have. If you’re braising them, just keep stirring in water every 10 minutes or so and stirring the greens until they are done to your liking (30 minutes or so?). Otherwise, simmer or slow cook for 3-4 hours on low, for very Southern style greens.
  8. Serve warm with more cider vinegar or pepper vinegar, salt and pepper.

Collardy Goodness

What are your favorite Thanksgiving dishes? What can you not live without eating on the big day?

We interrupt your previously scheduled Friday . . .

To remind you that sweet potato-ham biscuits are delicious and should be eaten daily.

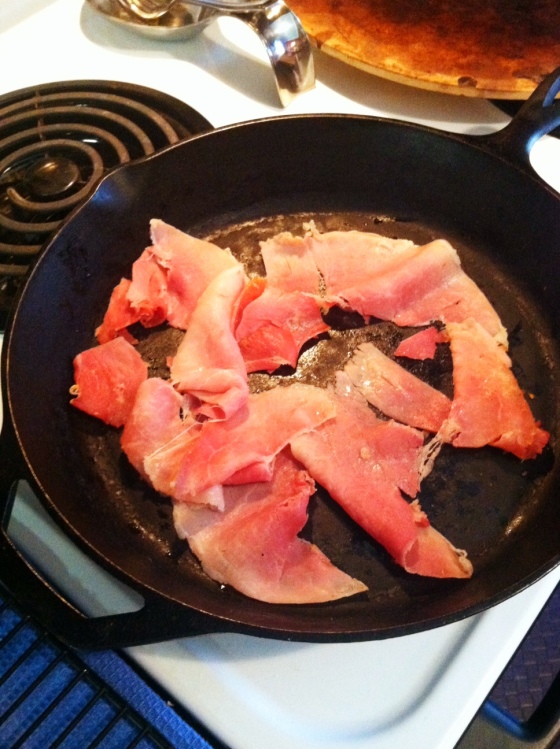
ham

1. Fry some of this


sweet potato bisuits

2. Make some of these


sweet potato and ham biscuits

3. Put them in your mouth


Edwards Ham and homemade Martha Stewart sweet potato biscuits made with local sweet potatoes. It would be a crime to live through another weekend without making these. Don’t break the law of ham. Just make some.