Back with the Beets

Hey, so it’s been awhile. And I apologize. But I’m not going to pretend like it’s a new year and I’m going to be better about blogging and make resolutions or promises about this, because then we would both be disappointed. See, around May of 2014 I turned my freelance career into an actual business: The Content Chop Shop. And since then I have been overwhelmed and overjoyed by the amount of business I’ve had. Quite a bit of this business is blogging….for other companies. This leaves very little time for blogging….for myself.

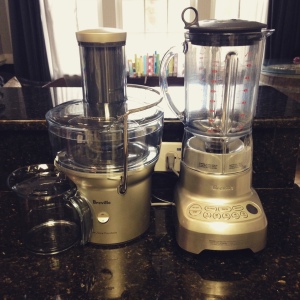
But this past Christmas I was gifted a new kitchen appliance . . . one that, unlike the uninspired toaster or a microwave, has basically spawned a cult of loyal followers. That’s right – someone gave me a juicer.

Breville Brothers. AKA - the gateway between me and 90% of my food.

Breville Brothers. AKA – the gateway between me and 90% of my food.

Why Juice?

I’m not going to go into a long, scientific, Alton Brown-esque explanation here like I usually do, but here’s the gist of it:

It’s hard to eat a bunch of fruits and veggies. It’s much easier to just drink them and get the same nutrients in one glass of juice than five or six whole foods. 

Yes, ideally I would eat two apples, three carrots, a nub of ginger, half a kohlrabi, a pear and a handful of parsley, but I’m not going to, so instead I juiced them all and had that for lunch. Simple. I like simple.

I’ve only been juicing for a couple of weeks, but so far I love it! I have so much energy when I do and the juices are really so much more filling that you would think. I really did have that juice I just mentioned for lunch today and it kept me satiated until 5:30 when I had a handful of pistachios while getting dinner ready.

But as you can imagine, it didn’t take me long to incorporate my all-time favorite food into my new juicing obsession: beets.

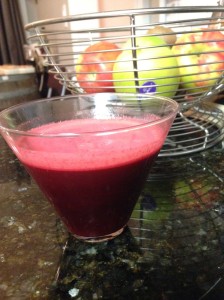
Blood-Red Beet Juice Martini

beet juice

Ingredients:

  • 2 honeycrisp apples
  • one raw beet, scrubbed and trimmed
  • four medium carrots, scrubbed
  • handful of baby kale

Method:

  1. When/if possible, choose all organic ingredients listed above. Wash and trim any greens from carrots and beets
  2. Process all ingredients through your juicer
  3. Pour juice into a martini shaker full of ice and shake for several seconds
  4. pour into chilled martini glasses and enjoy!

So why the martini shaker? 

Because it’s cool. I mean, really – when juice comes out of a juicer it’s basically just room temperature, so if you like your juice a little chilled, shaking it in a martini shaker is actually a kind of brilliant way (if I do say so myself) to bring its temperature down without diluting it too much by pouring it over ice. This juice was just a bit sweet from the apples and beets with a nice earthiness from the carrots and kale. It was a really good balance and when sipped during dinner, kept my appetite at bay, meaning it kept me from over eating, which is a common problem for me . . .

So while I can’t commit to blogging on a regular basis, I can commit to juicing. Because it’s easy, it’s good for you, and the other people in my cult tell me it’s cool.

Liebster Blog Award

Maple Avenue Juice nominated me for this blog award, which was great because I didn’t know about her blog until she nominated me, so now I have a new blog buddie who posts some pretty awesome juice recipes. Check her out.

liebster award

So, the Liebster Blog Award is actually not an award, but rather a good way to build community, connect with other bloggers and generate attention for newer bloggers. Here are the rules:

▪   Acknowledge the nominating blogger
▪   Answer 11 questions the nominating blogger has created for you
▪   List 11 random facts about yourself
▪   List some bloggers with fewer than 200 followers that you really feel deserve a little blogging love!
▪   Let all of the bloggers know you have nominated them. You cannot nominate the blogger that nominated you!
▪   Post 11 questions for the bloggers you have nominated to answer

Questions from Maple Avenue Juice:

  1. What was the last meal you had?
    I just ate some left-over quinoa, black bean, avocado and tomato salad. It’s one of my favorite dishes.
  2. What are 2 or 3 your favorite non-fiction health/wellness books?
    Animal, Vegetable, Miracle by Barbara Kingsolver; The Omnivore’s Dilemma by Michael Pollan
  3. What is a post on your blog that you are really proud of?
    Apparently my “One Pan Wonder” blog is kind of huge on Pinterest – who knows why – it’s definitely not my best recipe. The one I’m probably most proud of is my crock pot rib recipe, because let’s be honest – cooking perfect fall-off-the-bones ribs makes you feel like a badass.
  4. Who/What inspires you most on your ‘healthy living’ journey?
    The idea of a long, healthy life inspires me. There are so many places I want to see, so much traveling I want to do, so many experiences I want to have – all of those things are dependent on my health, so I take it very seriously.
  5. What is your favorite kitchen appliance?
    My blender. I have a Breville Hemisphere, which I highly recommend.
  6. Name your top 5 favorite fruits and/or vegetables?
    1. Beets (duh) 2. Kale 3. Cucumbers 4. Avocadoes 5. Tomatoes (obviously I prefer veggies to fruit)
  7. Where do you feel the most relaxed/still/at ease?
    The beach.
  8. What is your favorite holiday and why?
    I love Christmas because it’s the one time of the year I get to see my whole, huge family all in one place. That changes as you get older, and I don’t always get to see them every year, but when I do it’s magic.
  9. What is the most funny/silly/embarrassing thing you’ve said or done?
    One time I did “stand up comedy” on a tour bus in Mexico. Tequila and Mexican cowboys were involved, so…yeah.
  10. What is your favorite workout/physical activity/exercise routine?
    I love yoga, but can’t live without lifting weights and my elliptical.
  11. What is your main ‘healthy living’ goal for 2014?
    I’m going to Hawaii in November, and my goal is to climb the Haiku Stairs (aka “stairway to heaven“) in Oahu. It’s technically illegal, so who knows if I’ll get to – but I’m exercising in preparation for doing it – just in case.

11 Random Facts About Me:

  1. I have two pugs named Winston and Clementine. Very few people realize they are named after Winston and Clementine Churchill, who also had a pug named “Mr. Pug”
  2. I’ve known my husband for 25 years – we met when I was 3 and he was 5.
  3. I have a large scar on my left hand from cutting it while creating a robot when I was 9. Best believe I finished that robot when I got home from the hospital with over a dozen stitches.
  4. Although I love being a professional writer, I hate sitting still. My days are a struggle as I force myself to sit down to do the one thing I love to do when there’s just so much pacing to be done.
  5. Growing up I wanted to be an actress and sometimes still do, but am mostly glad I can go into Target without makeup on and no one knows who I am.
  6. I keep my friends forever – I have some friends I’ve had since (literally) the day I was born, some still from elementary, high school and college. Once I find someone I like, I cling on like a barnacle.
  7. I love to travel, but I consistently get home sick after four days. The only exception was when my husband and I went to Napa and there was just too much wine for anyone to want to go home.
  8. I am using this blog as a way to procrastinate on a very important writing project I have yet to begin.
  9. I love cooking for me and my husband, but cooking for any more than two people gives me major anxiety.
  10. My Meyers-Briggs personality type is INTJ, which is the rarest personality type for women – less than 1% of women fall into that type. (According to my husband, that actually qualifies it as a personality disorder, not a personality type…)
  11. I minored in Psychology in undergrad and if I had all the time and money in the world, I’d go back and finish a BS, MS and PhD in it.

OK! Now to nominate. So, I’m a really horrible community blogger and I really only read one other food blog very consistently, and that is Whisks and Words. Dana, no pressure! If you’d like to, please accept this award and answer the following questions:

  1. What brought you to cooking?
  2. What brought you to writing?
  3. When was it clear to you that you wanted to merge your two passions?
  4. What has been your best moment in food writing?
  5. What’s your best advice for others in the food writing “industry”?
  6. What is, hands down, your favorite thing to eat?
  7. What is, hands down, your favorite thing to COOK (I know that for me these are two very different things)?
  8. You were recently interviewing folks about food documentary “fall out” – what’s your personal philosophy on food, food safety and ethics?
  9. What can you never pass up at the farmers market?
  10. If calories were no issue, I would binge on ___________?
  11. Your favorite quote about food, cooking or eating.

Thanks again to Maple Avenue Juice for the shout out!

Green Goddess

The winter gets me down. I’m not a cold weather, snow loving kind of gal. I exist in a tiny percentage of people who actually don’t mind the swamp-like humidity of the south. I thrive in that. When the air gets dry and cold, my sinuses dry up, my nose starts bleeding and I get never-ending headaches. I also can’t sleep at night (or during the day) and, without exaggerating all that much, pretty much lose all of my ability to function. I also, believe this or not, lose my appetite. While most people seem to go into hibernate, stuff-your-face mode in the winter, I can barely think about food without just getting exhausted. These are dark times.

But. I have a solution.

Green Goddess Juice at I Heart Beets

Green Goddess Juice

Ingredients:

  • 1/2 cup of fresh pineapple, chopped
  • 1/2 cup mango (fresh or frozen)
  • 1 scoop of protein powder – vanilla flavored
  • 3 large kale leaves, stems removed
  • 1 tsp fish oil (flavored is best here)
  • 3/4 cup orange juice
  • 3/4-1 cup water

Method:

  1. Add all the ingredients to a blender. Use as much or as little water as you need to make it blend properly. This takes some experience and knowledge of your blender. I use a Breville Hemisphere blender – it’s on par with the Vitamix and is less than 1/2 of the cost. (you can watch an excellent review of it via America’s Test Kitchen on YouTube) It has a smoothie and a “liquify” option. I blend on the smoothie setting for 30 seconds, then on the liquify option for one minute. And there you have it – juice.

What’s great about this juice is that it’s covering a lot of bases for those of us who can’t seem to stomach the idea of solid food. It’s got iron, potassium, protein, complex carbs, vitamin C, Vitamin D (via the fish oil, which is what we are all lacking in the winter and need so desperately) and a whole host of other nutritious stuff. When I make this in the morning, I don’t even need coffee. *gasp* right??

Now, I’m a firm believer in equipping your kitchen with the right tools. I don’t believe in unitaskers or novelty kitchen items, ie, the “butter cutter” – because……you can’t just cut butter with a knife???

butter cutter

So what I’m saying is, if you don’t have a quality blender, buy one. I suffered through too many years of trying to make smoothies and juices in a sub-par blender. My mom and dad got me the Breville this year for my birthday when my rinky-dink “blender” finally offed itself by wrapping its rubber stopper around its own blades in the middle of blending a protein shake (it knew its time was coming to an end one way or another – for this, I respect it for going out on its own terms).

I would never shell out the $450 or $700 for a Vitamix and I would never recommend anyone else do it either, so whenever I’m looking for a good, quality, long-lasting piece of equipment for my kitchen, I always reference America’s Test Kitchen first – they have dozens of chefs who are doing the testing, breaking, and upfront buying for you.  Although the Breville was still a $200 investment (thanks, mom and dad!), I firmly believe it’s worth it in the long run to avoid the hassle, frustration, breaking, replacing and everything else that comes with an inferior product. Plus, it’s winter – I can barely remember what day of the week it is and whether or not I fed my dogs yet today, let alone deal with a crappy blender.

EDIT AND UPDATE: It should be noted that the kale here came from a US Certified Organic Farm on the Eastern Shore of Virginia, Mattawoman Creek Farms. Kale is one of the “dirty dozen” – 12+ fresh produce items that contain the highest amounts of chemical pesticide and herbicide residue. Buying these 12 items as certified organic from the grocery store is a good idea. Or if you buy your produce locally, just ask your farmer what their growing methods are to ensure you’re not reversing the good effects of the produce with the negative effects of chemicals. For those who don’t want to splurge on local or  organic produce, get your priorities straight, then take a look at the “clean 15” list of traditionally grown produce that suffers the least chemical compromise.

Kefir

A few weeks ago I saw an interesting item come up on my online local food co-op, Coastal Farms. Jen Vaughan, of Vaughan Farms Produce, had posted that she had some extra kefir grains, and was selling them, along with a mason jar and some instructions on what to do with them.  I was intrigued, so I did a little research and it turns out that kefir grains are not actually grains, but rather a symbiotic culture of yeast and bacteria. Yummy! When brewed, they ferment (just like beer or wine) and create an active probiotic culture (just like yogurt). Kefir is probably most well known as a yogurt type of product or kefir milk, but it turns out you can also brew kefir into “kefir water” which is sort of a sparkling-like fermented beverage. The fizziness of it comes from the fermentation and can be adjusted based on how much air is allowed in during the process. The whole process and product is very similar to Kombucha, which is probably a little more well recognized.

Kefir grains and my first kefir water batch

Kefir grains and my first kefir water batch

I ordered my first batch and got to brewing! Jen had a few great suggestions for recipes to give the water flavor. Plain kefir water isn’t exactly delicious, so it’s recommended that you mix it with flavorings, which can range from green tea to juice to vanilla extract, depending on how you want it to taste. For my first batch I did a green tea flavoring, then I followed that with a cream soda style flavor and now I am on to a citrusy grapefruit juice. The process is simple:

1. Dissolve 1/4 cup of raw, brown sugar (I’m using raw demerara sugar) in 1 quart of distilled water (or spring or mineral water, according to the interwebs) in a container with a lid (I used the 1 quart mason jar Jen provided). Make sure the water is room temp and not hot – that will kill the grains. Drop in a raisin or two (they will be your ‘tell’) and a lemon slice if you have one (helps with the Ph). Put in three tablespoons of kefir grains. Put the container with the lid just set on top – not screwed on, in a warm place out of direct sunlight. For me, this was on top of my fridge.

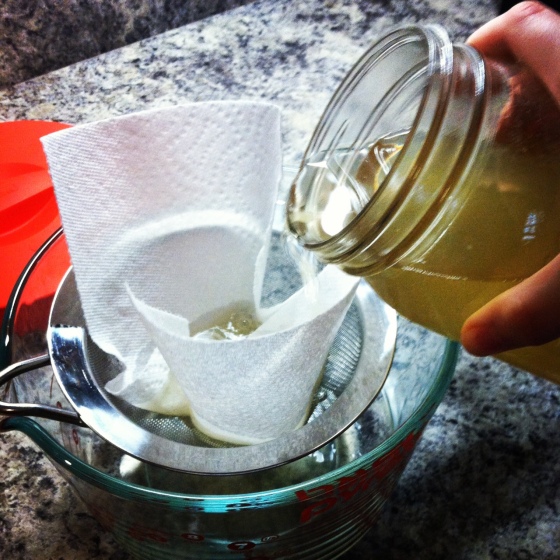
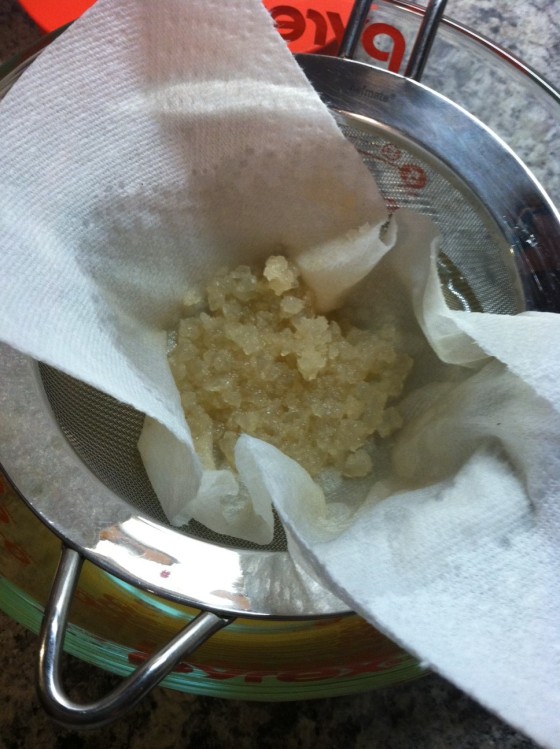
2. When the raisins have floated to the top of the water, usually 2-3 days, the water is done “brewing.” Remove the lemon slice and raisins, then strain the water through a fine sieve. Here’s the trick – kefir doesn’t like metal – you have to use glass or plastic or in my case, I just put a paper towel on my metal sieve and strain it that way. Cheesecloth would also work, if I could find it anywhere, ever. Put your kefir grains back into your mason jar or container and start again with 1 quart of water and 1/4 cup of sugar, raisins, lemon, etc – the grains can pretty much be brewed indefinitely.

I strain the kefir through a paper towel lined sieve since metal can kill the grains

I strain the kefir through a paper towel lined sieve since metal can kill the grains


3. Take your strained kefir water and add your preferred flavorings. Here is what I’ve tried:

  • 1 part very strongly brewed green tea to 1 part kefir water.
  • 1 tbs vanilla extract and an extra 1/4 cup raw sugar (creates a cream soda style water)
  • 1 part grapefruit juice to 1 part kefir water, one sliced lemon, one sliced lime

Once you’ve added your flavors, put it through a second fermentation – so put it back in another container with a lid just resting on top in a warm place out of sunlight for about 2 more days. At this point, if you’ve added things (like lemon and lime slices) strain it again and then bottle it up and put it in the fridge. The water will last as long as whatever you’ve brewed it with would. So however long you’d leave a pitcher of brewed tea in your fridge is how long you can leave the kefir water brew in there and it will be fine. Keep repeating the process with your other fermenting batch and you can have indefinite kefir water!

my first taste!

my first taste!

There are innumerable ways to prepare and brew your kefir water and also tons of sites online where you can purchase the grains. I found this site particularly helpful: http://www.culturesforhealth.com/water-kefir-frequently-asked-questions-faq

I have noticed that since I’ve been drinking the water every day, my stomach issues have decreased some. It’s like I’m drinking my probiotic pills (which I also continue to take) and it certainly can’t hurt to get as much good bacteria going as possible. If you suffer from any kind of intestinal issues, or even if you don’t – I would really recommend giving this a try. The fizziness is nice without being too much (I hate soda and carbonated beverages, but this is the perfect amount of fizz for me), and the flexibility of flavorings is really nice. And because the grains basically feed on the sugar in the brewing process, the overall sugar content of kefir water is much, much lower than you would imagine based on how much you put in at the beginning. According to CulturesforHealth.com “approximately 20% of the sugar you start with will remain following a 48- hour culturing process and almost all that sugar will have been converted to fructose from its original glucose-fructose state.  Therefore if you use our recommend ratio of 1/4 cup sugar to 1 quart water, the finished kefir will contain approximately 1.4% fructose.” That’s pretty low – much lower than fruit juice, juice cocktails and certainly less than soda.

So give something different a try! Love the good bacteria!

strained kefir grains

strained kefir grains

Pantry Raid – Part II

One of the things that had created an abundance of random odds and ends in my cabinets was the detox diet I did back in the late summer/early fall. My diet was extremely restricted and so I purchased a lot of things that were on the “OK” list that I would otherwise not eat like raw nuts, strange beans and wild rice. I had two boxes of wild rice and a can of Aduki beans that I just had no idea what to do with, but I found a recipe for wild rice and aduki bean stuffed acorn squash on Pinterest. Seriously, if you look long and hard enough, you will find the exact recipe you need. The recipe was from a vegan site, so I made a few changes to it to fit with what I had on hand, and it turned out pretty good. With a side of raw kale salad marinated in a home-made vinaigrette, this little vegetarian meal packed a serious healthy punch. Plus, it’s so protein packed, I could only eat half of it.

Wild Rice and Aduki Bean Stuffed Acorn Squash

Wild rice stuffed acorn squash

Ingredients:

  • 2 acorn squash, sliced lengthwise, seeds scooped out
  • Olive Oil
  • Wild Rice
  • 1 cup chopped onion
  • 1 can Aduki beans, rinsed and drained
  • 1 tbs Soy Sauce
  • 2 tbs honey (or Agave)
  • Pepper and Salt to taste
  • Cranberry sauce (canned or homemade)

Method:

  1. Rub the acorn squash down, inside and out, with olive oil, season with salt and pepper. Place an a baking sheet and cover with foil. Bake at 375 degrees for an hour, or until tender. 
  2. Meanwhile, cook the wild rice according to its directions, enough to make two cups.
  3. Heat the oil over medium heat in a large skillet. Add onions and sautee until soft. Add in Aduki beans, soy sauce, honey and season with salt and pepper. Combine and keep warm over medium low heat.
  4. Remove squash from oven when done, and scoop out the squash, leaving about 1/2” of squash in the shell. Chop the squash and mix it into the bean mixture and add the rice. Combine well over low heat until warmed through.
  5. Load each squash half with the mixture and top with cranberry sauce. Serve immediately.


I still have one box of wild rice left that I’m not sure what to do with, but at least those beans aren’t staring at me anymore.

What random item do you have in your cabinet that you’re just not sure what to do with?

the other green

I was reading a story in Edible Piedmont this morning about a kale recipe, which could also be made with collards. The author made this substitution because she said she knew how popular collards are in eastern North Carolina, so much so that the region has been referred to as “The Collard Belt.” I’ll take it. But I’ll also take kale. Any day of the week. I think it’s actually a bit more palatable to the general population than collards and is usually cooked in more various ways.

I know it’s sort of cliche to have a food blog and regale the benefits of kale. Everyone gets it, I know. Kale is great, it’s good for you, it’s a super food, put it in your smoothies, bake it into cookies, blah blah blah. But seriously. It’s great. So great that I highlighted one of my favorite kale recipes in my January column in Tidewater WomenThe column this month is about resolving to “Live Locally” and what that means, how it benefits not only you personally, but your community as a whole. I also put it in there to remind people that local food isn’t in hibernation during the winter months. It’s readily available, if you’re willing to look for it, and to try something you might not otherwise try (ie – kale. or chard. or other things that are green and look like dinosaur food.) Not wanting to be a hypocrite, I went out yesterday, tracked down some kale and made this recipe, which I share with you below. It really is a great recipe, especially for the new year, if (like me) you are trying to drop a few “party pounds” from the holidays….this meal is so packed with protein that after only half a bowl you’ll feel completely full. It’s also so lo-cal and healthy that even if you down all four servings in one night, there’s really nothing to feel guilty about. Except for the amount of flatulence you will inevitably plague your family with if you decide to do that. ANYWAYS.

I found this kale at a little roadside stand out in front of somebody’s house. These are my favorite places to shop because it’s fresh, you’re helping support someone’s backyard gardening habit, and the produce is usually dirt cheap. I got a pound of kale and a dozen fresh, free-range eggs for $4. I could also have scored 4 lbs of sweet potatoes for a dollar if I’d liked. Keep an eye out for these stands in your neighborhood or town. And don’t feel shy or weird about driving up to them. The people who set them out are usually so nice and happy to have a customer. The chicken came from a Crock Pot Chicken I’d made earlier in the week. This was one of three meals I got out of one five pound chicken. The only change I make in this recipe is that I use dried lentils that I cook and season myself. I’ve never been able to find canned lentils in my grocery stores, but if your store has them – more power to you. If you go this route, use half the bag (1/2 lb) – not two whole cups of dried beans, as they will expand as they cook. 1/2 lb will give you just over two cups once cooked.

Shredded Chicken with Kale and Lentils

kale cooking

CAST IRON LOVE.

Ingredients:

  • 2 tablespoons extra-virgin olive oil
  • 1 small onion, finely chopped
  • 1 teaspoon fresh thyme leaves
  • Coarse salt and ground pepper
  • 2 bunches kale, tough stems removed, torn into bite-size pieces
  • 2 cups lentils (from a 15.5-ounce can), drained and rinsed
  • 2 cups shredded cooked skinless chicken breasts
  • Lemon wedges, for serving

Method:

  1. In a large skillet, heat 1 tablespoon oil over medium heat. Add onion and thyme; season with salt and pepper. Cook, stirring occasionally, until onion is softened, about 5 minutes.
  2. Add kale and cook, stirring occasionally, until kale is wilted and tender, 4 to 6 minutes. Transfer to a medium bowl.
  3. Add 1 tablespoon oil and lentils to skillet; season with salt and pepper. Cook, stirring, until warmed through, about 20 seconds. Transfer to bowl with kale, toss to combine, and divide among four bowls. Top with chicken and squeeze lemon over top. Serves 4.
Shredded chicken with kale and lentils

Shredded chicken with kale and lentils

I agree with what you’re thinking – this looks like a recipe you see in those magazines all about getting fit with advertisements for muscle milk supplements. But honestly, it doesn’t taste like that. It tastes yummy AND healthy, which is possible, I promise. Jeremy even got seconds. Flatulence be damned!


Pinterest Perfection

I’m sure many, if not most, of you have heard of Pinterest. I first heard about this little site where you could “curate” your own visual boards over two years ago when the site was still in Beta testing. I did some quick researchpinterest-logo on the trusty interwebs and lo and behold, I was able to track down the Pinterest CEO to his person twitter page, where I began a barrage of direct messages begging for a beta tester invite. I got it. His name is Ben, by the way, and he’s super nice. I was one of the first few thousand people to use the site, and use it I did. I currently have over 30 boards, 981 pins and 125 followers. When Pinterest first started it was much more of an art and design crowd. The cool kids who were developing the site had no doubt invited their other cool kid friends who I’m sure were all interior designers, graphic artists, and web developers in San Francisco (that’s where the company is based, not the valley, which is why the site and its people are so cool) to give it a whirl. As Beta opened up to user invites, and the site became a real, live thing, it became much, much, much more crafty, crock potty and crap to do with your kidsy. But you know what? I still love it. Despite the fact that I have to sift through hundreds of pins of maternity photo sessions to get to the thing I’m looking for, despite the fact that when I search the food category I have to ignore a million recipes that suggest throwing four different kinds of canned Campbell’s crap into your slow cooker and feeding it to your family of 10 for less than .30  cents a serving, I still think it is an awesome, amazing thing. And every once in awhile, you run across some real gems.

On Wednesday of this past week, I made THREE recipes for one meal that I found on Pinterest: A Roasted Garlic salad dressing, a rosemary and Parmesan overnight bread, and an Italian style beef and butternut squash stew. They were all the kind of things that keep me obsessed with the site. Diamonds in the rough.

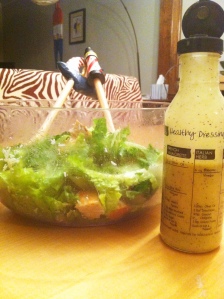
The Roasted Garlic Vinaigrette is a MUST try to anyone who loves garlic on the level that I do. Two heads of garlic go into this dressing. And while you do have to roast the garlic for a good half hour, the dressing itself is really easy to make, and you probably have most of the ingredients on hand. I’m currently obsessed with making my own salad dressings and have tried several I’ve found on Pinterest, but this one is my favorite.

From Fat Girl Trapped in a Skinny Body:

Roasted Garlic Vinaigrette

pinterest meal salad dressing

Ingredients:

  • 2 heads of garlic, roasted and peeled
  • 1/2 cup extra virgin olive oil
  • 1/4 cup apple cider vinegar
  • 2 tbsp lemon juice
  • 1/2 tsp kosher salt
  • 1 tsp black pepper
  • 1 tbsp honey

Method:

  1. Cut the pointy top off of the garlic. Brush them with olive oil and roast them in a pan in the oven at 400 degrees for about 25 minutes, until it is starting to turn golden brown and soft. Remove from the oven, allow to cool. Once the garlic is cool, peel the skin off. Discard the skins, save the garlic. *Skin peels off really easily after they are roasted.
  2. Add all the ingredients to the food processor and process until smooth. Refrigerate until ready to serve.*If some of the skin get processed with the rest of the dressing, no big deal, it won’t change the flavor.

The salad dressing can be vegan if you sub the honey for agave. And it is dairy free, with no substitutions!

This dressing is tangy, but has that deep, rich caramelized taste from the roasted garlic. It’s a vinaigrette, but it’s creamy because of the garlic being processed right into it. Keep this for a week or so in your fridge in a covered container.

The bread recipe I comes from Simply So Good. I used her basic bread recipe, and put in my own additions. This bread is baked in your cast-iron enameled Dutch Oven (you have one of those, right??). I have a big, blue Le Creuset that is the Pride and Joy of my kitchen. Jeremy gave it to me for Christmas a few years ago. They are usually in the $300-$400 range, but sometimes you can score them at T.J. Maxx for half the price, which I believe is what he did (smartly). Other cast-iron enameled pots are fine for this recipe also, but when you have a Le Creuset, you tend to brag about it. Here is a view down on mine to give you an idea of the size of the vessel you might want to use:

I ❤ Le Creuset

OK, enough about my awesome piece of iron. Here’s the recipe.

Crusty Bread

Crusty Overnight Bread

Crusty Overnight Bread

Ingredients:

  • 3 cups unbleached all purpose flour
  • 1 3/4 teaspoons salt
  • 1/2 teaspoon yeast
  • 1 1/2 cups water

 Method:

  1. In a large mixing bowl, whisk together flour, salt and yeast.  Add water and mix until a shaggy mixture forms.  Cover bowl with plastic wrap and set aside for 12 – 18 hours.  Overnight works great.
  2. Heat oven to 450 degrees.  When the oven has reached 450 degrees place a cast iron pot with a lid in the oven and heat the pot for 30 minutes.  Meanwhile, pour dough onto a heavily floured surface and shape into a ball.  Cover with plastic wrap and let set while the pot is heating.
  3. Remove hot pot from the oven and drop in the dough.  Cover and return to oven for 30 minutes.  After 30 minutes remove the lid and bake an additional 15 minutes.  Remove bread from oven and place on a cooling rack to cool.

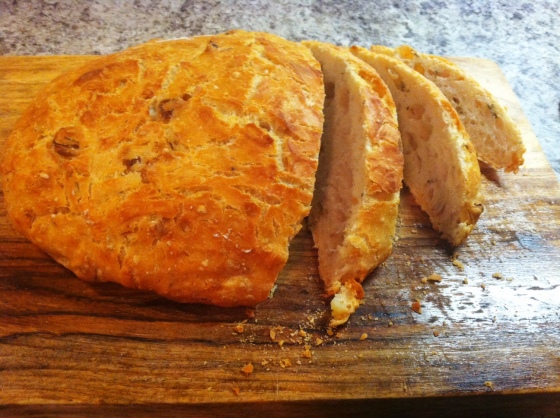
To this recipe, I added 1/4 cup of fresh grated Parmesan Cheese, 1/8 cup of fresh rosemary (from my garden), and several cloves of smashed and roughly chopped garlic. I added that in to the dough at the very beginning and then proceeded as normal through the recipe.

pinterest meal bread cut

This thing turned out beautiful. There is nothing quite like making your own bread from scratch and this is really a pretty easy way to do it.

Finally, the main course – Beef and Butternut Squash Stew from Closet Cooking. I’ll be honest and say there are a few things wrong with the way this original recipe is written, so the recipe below has a few very minor changes from myself, just to make things more clear.

Italian Style Beef and Butternut Squash Stew

pinterest meal stew 2


Ingredients:

  • 2 ounces pancetta (diced)
  • 1 pound beef (cut into 1 inch cubes) (My Note: he doesn’t specify what kind of beef to use here. My suggestion is to get a sirloin roast, if you can find one – that’s what I used. Otherwise a small round roast is fine or chuck if nothing else is available)
  • 1 onion (chopped)
  • 3 cloves garlic (chopped)
  • 1/2 teaspoon red pepper flakes (optional, to taste)
  • 1 tablespoon rosemary (chopped)
  • 1 tablespoon thyme (chopped)
  • 1 cup Italian red wine (My Note: I used a Zinfandel. It doesn’t have to be Italian, don’t stress out, just use a decent red wine that’s not sweet)
  • 3 cups beef broth
  • 1 splash balsamic vinegar
  • 1/4 cup sundried tomatoes (chopped)
  • 1 (28 ounce) can diced tomatoes (My Note: He doesn’t specify drained vs. undrained. Because he does not, I put them in without draining them. It gave my stew a more “soupy” consistency, which I was OK with. If you want this to be more like a traditional stew, then drain the tomatoes before adding).
  • * parmigiano reggiano rind (optional)
  • 1 teaspoon oregano
  • salt and pepper to taste
  • 1 pound butternut squash (peeled, seeded and cut into 1 inch cubes)
  • parsley (chopped) (My Note: optional for garnish. I used a bit of grated Parmesan instead).

Method:

  1. Cook the pancetta in a large pan on medium heat. (My Note: or Dutch Oven. Again, with my Creuset)
  2. Add the beef and brown on all sides in the grease from the pancetta and set aside. (My Note: I coated the beef cubes in flour first. I’ve always done this when searing beef that is basically going to be braised later. It also helps to thicken the sauce a bit, but it’s up to you).
  3. Add the onion and saute in the pancetta grease until tender, about 5-7 minutes.
  4. Add the garlic, red pepper flakes, rosemary and thyme and saute until fragrant, about a minute.
  5. Add the wine and deglaze the pan. (My Note: deglazing means you add a liquid to absorb the browned bits from the pancetta, beef and aromatics. When you add the wine to the hot pan, it will steam up. Take a wooden spoon and use that moment to scrape up all the bits in the bottom of the pan, stirring them into the liquid to create a flavorful base).
  6. Add the beef, broth, balsamic vinegar, sun-dried tomatoes, diced tomatoes, parmigiano reggiano rind, oregano, salt and pepper and bring to a boil.
  7. Reduce the heat, cover and simmer until the beef is nice and tender, about 1-2 hours.
  8. Add the squash and simmer until it is tender, about 15-20 minutes. (My Note: more like half an hour, at best).

This stew was filling, hearty and really quite healthy. Serve it with a glass of the same wine you used in the soup – superb! Always cook with wine that is good enough to drink. When you cook with wine, you are cooking off the alcohol, but intensifying the flavor. If you intensify a crappy wine, you will just get really intense crap. No Bueno.

Pinterest Perfection

Pinterest Perfection

The dressing, served over a bed of Organic romaine lettuce, the garlic, rosemary and Parmesan bread and this stew altogether? Perfection. Pinterest Perfection.


The root of it all

I just gave myself an award for the most clever blog title ever.

i ❤ beets

It is a shame, I realized, that this blog’s namesake has never really been examined thoroughly. I think in my very first blog post I may have posted a picture of a beet dish I had done, but I’ve never really delved into this amazing little root that inspired me to make this blog. There are a few reasons that beets are the thing I happen to heart. They are available locally, they are available at several times throughout the year and many people don’t like them. Why is that a reason to make beets the central theme of a blog? Because I think I can change people’s minds. I think a lot of foods out there that deserve our attention but suffer general distaste have just been presented wrong all this time. Like the poor Brussels sprout, which I will post about later . . .

Take, for instance, my husband who insisted he hated beets. So I asked in what format he had experienced beets in the past and he said either canned, pickled or boiled to death. Well, no wonder. He also hated Brussels sprouts for similar reasons. But there is a simple answer to both of these food fears and it is this: roasting. Roasting, which uses dry, indirect and diffused heat (such as an oven) increases flavor by caramelization and the Maillard browning reaction. Essentially, roasting enhances the sugars in foods through a process called pyrolysis, which I will not get into, because I barely passed chemistry. But here is what I do know: it makes food delicious. Especially foods like beets, which already have a high natural sugar content, just waiting to be released.

Beets are also so nutritious. Here are some facts from Nutrition and You about beets:

  • Beets are a rich source of phytochemical compound, glycine betaine. Betaine has the  property of lowering homocysteine levels within the blood. Homocysteine, a highly toxic metabolite, promotes platelet clot as well as atherosclerotic-plaque formation, which, otherwise, can be harmful to blood vessels. High levels of homocysteine in the blood result in the development of coronary heart disease (CHD), stroke and peripheral vascular diseases.
  • They are also a rich source of B-complex vitamins such as niacin (B-3), pantothenic acid (B-5), pyridoxine (B-6) and minerals such as iron, manganese, copper, and magnesium.
  • The root has very good levels of potassium. 100 g fresh root has 325 mg of potassium or 7% of daily requirements. Potassium lowers heart rate and regulates metabolism inside the cells by countering detrimental effects of sodium.

And while us die-hard beet fans can eat a beet canned, pickled, boiled, grilled or anything else, for those skeptics out here, this is my GO-TO beet recipe. I’m not sure where it originated from…I think a friend may have suggested this method and I’ve just sort of made it my own over time, I’m not really sure. My hope is that you will love it enough to make it your own, adding, subtracting and substituting to your liking.

Roasted Beet Salad with Vinaigrette

Ingredients: Beets in vinaigrette

  • One bunch beets (as seen above)
  • 3 tbs olive oil
  • 1 tbs vinegar of your choice (balsamiq, red wine, champagne, whatever you like)
  • 1 shallot, finely diced
  • 1 tbs dried herbs (Italian, Herbs de Provence, fresh or powdered garlic or whatever else you’d like)
  • Salt and Pepper to taste
  • 1 cup crumbled feta cheese

Method:

  1. Pre-heat oven to 375 Fahrenheit. Cut the beets off their stems and trim off the tops and the “tails” of each beet. Clean each beet so they are free of dirt. Wrap each beet in individually in tin foil and place in the pre-heated oven, directly on the center rack. Roast for 30-40 minutes, or until each beet is easily pierced with a knife. 
  2. While the beets are roasting, create your vinaigrette. The most important thing to remember here is the a vinaigrette dressing always 3 parts oil to 1 part vinegar. You can use any combination or any measurement (tsp, tbs, cup, etc), as long as you keep that ratio the same. Pour your oil, vinegar, shallots, herbs, salt and pepper into a medium sized bowl and whisk until they are emulsified. Set aside until beets have finished roasting.
  3. When beets are easily pierced with a knife, unwrap from tinfoil and allow to cool. Take an old dishtowel and peel the beet’s skin off with the towel – if it’s roasted to completion, the skin should slide off easily. Do this with each beet.
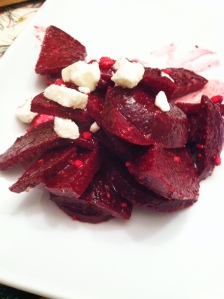
  4. Cut each beet in half or in quarters, if large, and cut into thin slices. Re-whisk your vinaigrette so it is well blended, then add your beets to the bowl and toss to coat. Plate, then top each serving with a spoonful of feta cheese.
Trim and wash beets

Trim and wash beets

A well emulsified vinaigrette

A well emulsified vinaigrette

Beets

After roasting, remove skin with a dish towel

Served with Greek salad, crusty French bread a Pinot Grigio.

Served with Greek salad, crusty French bread a Pinot Grigio.

If you don’t like beets like this, then I grant you the right to dislike beets. But before you file them away in things that are gross and that you refuse to eat, please try this recipe. Please. Give beets a chance.

Note: these beets were purchased from Westside Produce and Provisions where they were sourced from New Earth Farms in the Pungo area of Virginia Beach, where they use sustainable and organic growing methods. 

Local Beef Three Ways

I’m excited to share with you all three different ways to approach one ingredient: local, pasture-raised beef. This will be the first time I’ve featured beef on the blog, so hold on to your steak knives! Actually, don’t. I’m not going to be discussing steaks. Sorry, you’re on your own there. The beef used in all of these recipes came from Windhaven Farm in Windsor, VA. They raise “Natural, Angus Beef” and here is how they describe it (from their website):

“Natural beef is a healthy and safe choice of quality beef.  The cattle are birthed on our farm.  We do not receive feed stock from unknown sources.  Our farm does not mass produce cattle.  The cattle are antibiotic free and do not receive growth hormones. The cattle are fed 100% grass, hay, and grain.  Therefore the cattle are healthier and leaner resulting in lean, healthy beef. Natural means: No antibiotics, hormones, ionophores, or medicated feeds No feeding of animal by-products. Grass fed, grain finished – grain is used to help “finish” and marble the beef. All natural from birth. Parasiticides are not used within 30 days of slaughter date.”

You can also purchase completely grass-fed beef from them in 1/4, 1/2 or whole packages. Yes, that means 1/4, 1/2 or a WHOLE COW. I know lots of cross-fitters (paleo dieters) that go in on entire cows together, and it actually works out to be a great deal, if you have the room to store even a small portion of an entire cow. I do not. So I usually order their beef in completely reasonable increments, like you know, a pound of ground beef. Their beef is available for pick up at their farm, or through Coastal Farms Co-op and at a few retail stores in Hampton Roads like Heritage Natural Market.  They also do occasional deliveries around the area.

The weather is really cooling down around here and a lot of the farmers markets have stopped for the season and while there is still lots of produce to be found if you’re willing to look for it, it is definitely starting to feel like hearty-food weather. So here are three great options to satisfy your cool-weather cravings:

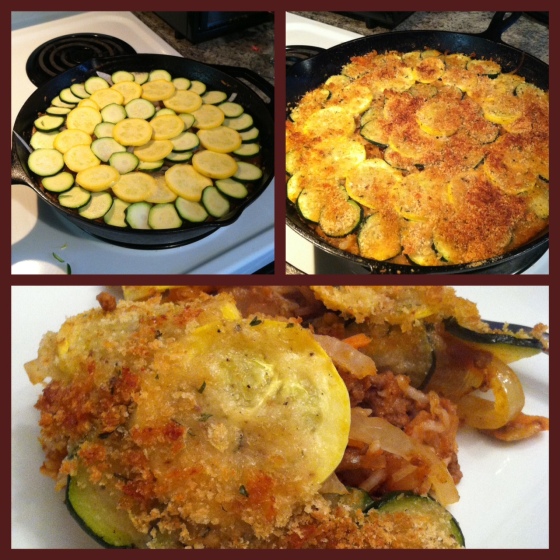
Beef and rice skillet with late-summer veggies

Meat Sauce:

Ingredients:

  • 1 1/2 tsp. olive oil
  • 1 pound ground beef
  • 1/2 medium yellow onion, diced small
  • 2 carrots, shredded
  • 2 cloves garlic, roughly chopped
  • Salt and pepper
  • 1 can (28 oz) whole peeled tomatoes, pureed in a blender

Directions:

  1. In a large heavy pot, heat oil over high. Add meat and cook, breaking it up with a wooden spoon, until it begins to brown, about 5 minutes. Add onion, carrots, and garlic and cook until meat is browned and onion is soft, about 5 minutes. Season with salt and pepper, add tomato puree, and bring to a rapid simmer. Cook, stirring occasionally, until liquid is slightly reduced, about 15 minutes. Season with salt and pepper.

Casserole:

Ingredients:

  • 1/2 cup fresh breadcrumbs
  • 1/4 cup grated Parmesan (1 oz)
  • 2 tbsp Olive Oil, divided
  • meat sauce (recipe above)
  • 1/2 cup long-grain white rice
  • 1/2 medium yellow onion, thinly sliced lengthwise
  • 2 zucchini or yellow squash, very thinly sliced
  • salt and pepper

Directions:

  1. Preheat oven to 475 (Fahrenheit). Combine breadcrumbs, Parmesan and 1 tblsp olive oil.
  2. In a large cast-iron skillet, bring meat sauce to a rapid simmer over high. Stir in rice and remove from heat.
  3. Top with onion, then carefully arrange zucchini/squash in a single, slightly overlapping layer. Season with salt and pepper, drizzle with remaining tbs. olive oil and top with breadcrumb mixture. Return to heat and bring to simmer.
  4. Cover with foil and bake 10 minutes. Remove foil and bake until rice is cooked through and breadcrumbs are golden, about 10 minutes more. Let cool 5 minutes before serving.

*This recipe is adapted from Everyday Food

The meat sauce part of this recipe can be adapted and used for anything – on top of pasta, as sloppy-Joe filling, mixed with cheese and stuffed into pasta shells – whatever you want! This is a really perfect recipe for right now because squash and zucchini are still available locally, but it’s still hearty and warm and filling for fall.

Slow Cooker Beef Ragu

Ingredients:

  • 1 medium yellow onion, diced small
  • 3 cloves of garlic, minced
  • 1 small can of tomato paste
  • 3 tbs chopped fresh oregano
  • 1 beef chuck roast (2-4 lbs is fine)
  • coarse salt and pepper
  • 1 tbs red-wine vinegar
  • 1 tbs balsamic vinegar

Directions:

  1. In a 5-6 quart slow cooker, combine onion, garlic, tomato paste, oregano, salt and pepper to taste. Season roast with salt and pepper and place on top of onion mixture.
  2. Add 2 cups of water, cover and cook on high until meat is tender and can easily be pulled apart with a fork, 4 1/2 hours (or 9 hours on low).
  3. Let cool 10 minutes, then shred meat in slow cooker with 2 forks and stir in vinegar to taste.

This recipe was also adapted from Everyday Food

You could serve the ragu over whatever you liked – rice, pasta, polenta, mashed potatoes. I had originally planned on serving it over spiced and grilled polenta, but then the grocery store by our house decided stocking polenta (and anything else I’m ever specifically looking for) is stupid. So for whatever reason I opted for no-yolk egg noodles instead. Big mistake. I’ve never liked these things and I still don’t. There’s not enough salt in the Dead Sea to make them taste like anything at all, and the texture is slippery and slimy. The ragu was great, but my suggestion is to go to a better grocery store than mine and find some good polenta, or make your own, or make some stiff grits or something besides egg noodles. Seriously, maybe even some wood shavings from the pet store might work better. Just go with your gut.

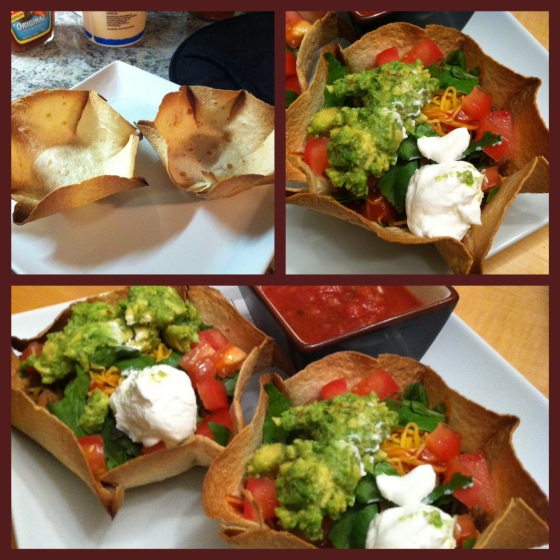
Taco Bowls

Ingredients:

  • Burrito-sized soft tortillas
  • Olive oil spray
  • 1 lb ground beef
  • Taco seasoning
  • Refried Beans
  • Taco toppings of choice

Directions:

  1. Preheat oven to 425. Place a cooling rack inside a baking sheet and turn 4 ramekins upside down on the rack. Microwave your tortillas for 15 seconds to make them soft. spray each ramekin with olive oil. Mold tortillas over each ramekin, making them into the shape of a wide bowl. Spray outside of tortillas with additional olive oil.
  2. Place baking sheet with tortillas into the pre-heated oven very carefully (the ramekins will want to slide around on the rack). Bake for 10 minutes or until golden and crispy. Remove from oven and let cool on the ramekins. Wait until they have cooled to the touch to remove them from their molds. This will ensure they keep their shape.
  3. Meanwhile, brown your ground beef in a large skillet over medium heat. Drain off fat. Return meat to the burner and add 1/4 cup of water and taco seasoning to taste. Keep on low until tortillas are finished baking.
  4. In a small saucepan, warm your refried beans until smooth and heated through.
  5. Once the tortillas have cooled to touch, fill them with your taco accouterments: I like to make the base with refried beans, topped with the beef, then topped with shredded jack or cheddar cheese, taco sauce, diced tomatoes, lettuce, some mashed and seasoned avocado and a dollop of plain, nonfat Greek  yogurt (I use this in place of sour cream in everything. The taste is exactly the same, but without the fat and it’s easier on my stomach).

You can make more than 4 bowls at a time, if you need them. I just only needed four and conveniently I only have 4 ramekins. Jeremy and I each ate two bowls (they are smaller than the ones you get at Mexican restaurants, so put your judgey face away). And we had chips and salsa on the side. This is a fun update on taco night.

Taco salads are great until you decide to start eating the shell. The idea seems great and starts out totally civilized. Something like this:

Oh yes, I’ll just take this one little bite of the shell.

Then all of a sudden all hell breaks loose, a tornado sweeps through your taco salad and you’re left with this tragedy:

The horror! The horrooooorrr!

Which is fine, really – it all tastes the same anyways. But if aesthetics is your thing, then just eat the salad portion with tortilla chips or something and save your bowl for decoration or to hold your keys or a hat for a small child or large dog – your call.

So there you have it – local beef three ways. Certainly you could do all of these recipes with beef you buy at the grocery store, that came from a CAFO (Concentrated Animal Feeding Operation), where cows are fed nothing but grain, which makes them sick, which requires them to take antibiotics, which remains in the meat, which over-dosed the entire population with antibiotics so that we all have reduced good bacteria in our bodies so that we are all more prone to sickness so that we all end up having to take more antibiotics like the poor cows before us, which in the long run makes us even more sick, needing more medication and so on and so forth. Again – your call.
Besides that, grass-fed beef has higher omega-3’s, is leaner, often has more protein, and is generally ethically raised. There’s no doubt red meat is not the most healthy thing we can all eat, but if you’re going to eat it (and we all are – the average American eats 110 lbs of red meat every year), then make it the healthiest, most environmentally friendly, ethical meat that you can eat. Cost? Please. Let’s not get into that – just eat your taco bowl and enjoy the grass-fed goodness.

Detox and why health care will never be “reformed” (ie – heavy stuff for a Friday)

I haven’t blogged lately because I’m taking a break from food. Not from cooking or from trying new recipes, but from food. From eating it. I’m doing a detox. And now, in many more words than are probably necessary, I will tell you why.

For the past year I have been through the medical industry ringer trying to find the cause or cure for digestive issues that I’ve dealt with for most of my life but most severely in the past two or three years. After several months of intense “suffering,” I finally made an appointment with a gastroenterologist in August 2011. Several tests were done to find out if I had celiac, crohn’s, ulcerative colitis, etc., none of which I had. So the doctor decided to have me tested for an intestinal bacterial overgrowth, which I did have. I was put on an antibiotic for 10 days that is so strong it is usually only give to liver disease patients who have so many toxins in their bodies that their brains literally stop working. It cost me over $400 (just for the pills, that doesn’t include the cost of the test) and did not work. So the doctor decided it was IBS. Again, another medication. Again, no results. Finally he decided to do a full sonogram of my entire stomach, intestines, liver, kidneys and gallbladder to check for tumors, stones, etc. Nothing. Finally, he says to me, “well, there’s really nothing we can do unless you’re willing to change your diet.”

Me: “ummmm…..excuse me? I can fix this just by changing my diet????”
Dr.: “Oh yeah. I just don’t usually recommend that anymore because nobody is willing to do it.”
Me: *face palm*

He gave me the name of a book called Breaking the Vicious Cycle that outlines a specific carbohydrate diet that has worked extremely well for most digestive issues, and in some cases has even cured some patients’ completely, even from things like Celiac Disease. I bought it that day. But as I thought about changing my diet, possibly for life, I thought about all the things and ways I had eaten in the past and how hard it might be to pinpoint the exact thing or things that caused my symptoms, so I began researching detox programs. I figured if I was going to completely change my diet, I might as well start with a clean palate. I found a program called “Clean” that was put together by a real Doctor, (not some hippy dippy whack-job) Dr. Jundro, who is a practicing cardiologist in New York. He went through very similar symptoms to my own after becoming a doctor and found relief through detox and Functional Medicine (a combination of Eastern and Western medicine). The detox program he created and outlines in his book, Cleanis safe and provides you with all the nutrients you need during your detox, which you can choose to do for one to three weeks at a time. Here’s how the program works:

You have two liquid meals a day. One for breakfast:

Carrot, peach and mango juice. My magic bullet and food processor are my best friends right now.


One for dinner:

smoothie

Apple cinnamon smoothie with Virginia Apples.


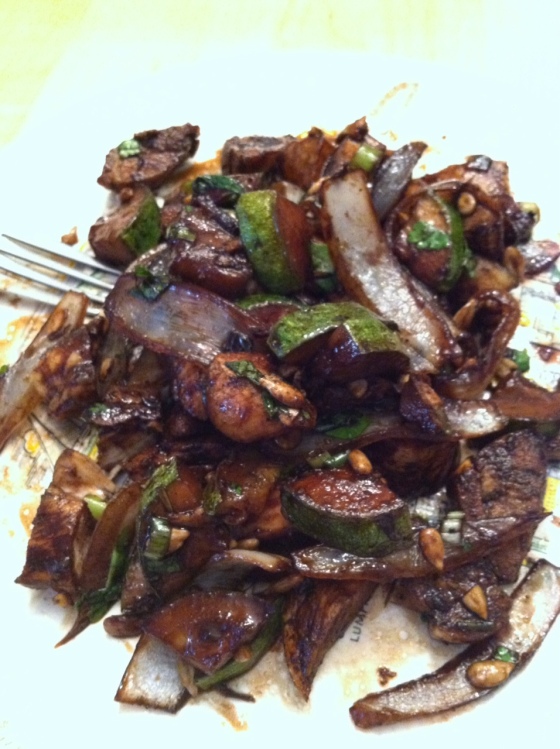
For lunch you can have a small solid meal that fits the detox guidelines:
chicken

Balsamic glazed chicken and zucchini with wild rice

You can also have a small snack in the mid-morning and mid-afternoon that fit the detox eating guidelines:

White bean and garlic dip with raw veggies


And you can have herbal teas and there are several supplements you take each day:


Tower of Supps!

The detox guidelines are pretty intense. You cannot have caffeine, sugar, alcohol, starch, pasta, corn, soybeans or soy products, shellfish, beef, pork, wheat, gluten, dairy, peanut or peanut products, raisins or grapes, citrus, or nightshades (tomatoes, potatoes, peppers). The idea being that you cut out every kind of common allergen, irritant and foods that cause your blood to become acidic over time (like nightshades). When your system balances, gets rid of the acidity and irritants, it can detoxify itself and restore itself to a neutral state from which to begin eating again, introducing one type of food back into your diet at a time until you pinpoint the cause of the symptoms. During the detox you also take very strong doses of priobiotics to help restore the good flora in your intestines.

As you can imagine, this has been difficult for someone like me who loves food, loves to cook, and is more or less IN love with wine. But it was my last resort and I was tired of feeling miserable every single time I ate a meal. And more importantly, I felt like it was my responsibility. When my doctor told me, as a LAST RESORT, that I could change my diet and live symptom free, it was completely eye opening for me. Most people won’t do this. Most people won’t take the responsibility for their own health. They want an easy answer and they want it in easy-to-swallow capsules. We are addicted to our addictions. We pop pills that often have side effects worse than the symptoms they are meant to treat. And here is where I get on my soap box about health care, because (Now, listen. Listen, now, as Dr. Stanley would say). Americans, in general, do not wish to be well. And you cannot reform a system in which the people who belong to the system do not want to be reformed. In other words – WE have to want to change, if we want health care to change, and what we need to change is the entire idea of health care. In fact, it needs to become just that: the care of our health, not the treatment of disease. I decided to give up on doctors appointments and treatments and pills and procedures and decided instead to care for my health. It is not easy. I have been craving brownies for 11 days straight. But this is my only answer.

I only have about a week left on the program before I start introducing foods back into my diet, and I’ll admit I’m a little nervous to see what I find out. Will I be disappointed if I have to give up cheese or oysters or (GOD FORBID, seriously, I’m praying on this one) wine? Yes, of course. But you know what? It’s better than being dependent on pills, and their adverse side effects, or going to a never ending string of doctors appointment and having test after meaningless test taken. It’s not as fun as my usual food posts, I’ll admit, but keep checking back for detox updates and my adventures in re-introducing food back into my diet! That will be like  a party!