Shrimp Ceviche Saturday

I’m on my own this Saturday night and whenever that happens I like to make myself something special. Usually that means a giant wheel of Brie and a bottle of wine but since I’m cutting back on the cheese I decided to do something a little more “clean.” I accidentally bought pre-cooked shrimp at the grocery store the other day (instead of raw) – this is my problem with the grocery store. I want to get out of there so bad that I just blindly grab things that look right. I’m the worst grocery shopper ever. I usually only come home with half of what I need because I hate it so bad. It’s a conundrum to love to cook but to hate to shop for food. Oh well. Crosses to bear and all that. Anyways! Shrimp ceviche it is! It just sounded perfect. And it is. And easy. And there’s really no “cooking” involved. Cheers!

20130316-202832.jpg

Shrimp ceviche

Ingredients:

  • 1 red onion, diced small
  • 1 tsp olive oil
  • the juice of two limes
  • 1 avocado, diced
  • 1 jalapeno, seeded and diced small
  • 1 cucumber, peeled and diced
  • 1/2 pint cherry tomatoes, each tomato quartered
  • 1 lb large, cooked, deveined shrimp
  • 1/4 cup chopped cilantro
  • salt and pepper to taste

Method:

  1. Dice red onion and put into a bowl with the lime juice, season lightly with salt and pepper and let marinate at least 5 minutes 
  2. Dice the avocado, jalapeno, cucumber, tomatoes and add to bowl with onions
  3. Peel the shrimp and cut into three pieces per each shrimp – add to the bowl with the rest of the ingredients, mix well. Stir in the cilantro. Serve in martini glasses at room temperature or chilled.
Shrimp Ceviche

Shrimp Ceviche

Ceviche is a general term for any seafood dish, where the seafood is “cooked” by curing in an acidic  marinade, usually primarily made of lime juice or tomato juice. I can’t recommend to you that you use raw shrimp in ceviche unless you are getting it fresh off the boat, straight from the water and are curing it within half on hour of picking  it up. Fish is a little different, but with shrimp, just be careful.

This dish is so light and delicious and pairs perfectly with a New Zealand Sauvignon Blanc. So light and delicious, in fact, that before you know it, you’ve eaten an entire bowl of Ceviche and 3/4 a bottle of wine . . . although, to be fair, I only made half of this recipe. And to be perfectly honest, I drank the entire bottle of wine. What? It’s St. Patrick’s day weekend, give me break. Ceviche, take me away!

Pantry Raid IV: better bulgur

Bulgur sounds gross, and I get that. But it’s really not. Bulgur is parboiled cracked wheat berries. It’s a super whole grain with a wonderful nutty taste. It also has a great texture that I can only describe as “toothsome.” It isn’t hard, but even after being soaked, it has tooth –  like very good al dente pasta. Just one cup of bulgur has over 25 grams of fiber and over 17 grams of protein. And incidentally, I had a huge bag of it in my cabinet that I needed to start working on getting rid of.

Bulgar, like quinoa, is a great base for salads. This bugar salad recipe came from Everyday Food, and it’s really light and delicious and keeps well. Make it at the beginning of the week, measure it out into individual containers and then grab them for a healthy lunch on the go. This recipe makes a lot – like most grains, just one cup, once cooked, makes a huge amount of food and because it is high in fiber and protein, you don’t need to eat much to get full. I made this salad for dinner with a yummy marinated salmon and still had enough left over for lunch several days that week. This salad also incorporates chick peas (or Garbanzo beans – whichever name you prefer). Chick peas are also full of protein, so you really can’t go wrong here. Leave out the feta for a (still delicious) Vegan side dish.

Bulgur and Chick Pea Salad

bulgar with salmon close

Ingredients

  • 1 cup bulgur
  • 2 cups boiling water
  • 1 can (15.5 ounces) chickpeas
  • 1 tablespoon lemon zest and 2 tablespoons juice
  • 3 tablespoons extra-virgin olive oil
  • 1/4 cup roughly chopped fresh dill
  • 1/2 cup crumbled feta (2 ounces)
  • Salt and pepper

Directions

  1. In a large bowl, combine bulgur with boiling water. Cover and let stand 20 minutes; drain and return to bowl. Rinse and drain chickpeas, then add to bowl with lemon zest and juice, olive oil, dill, and feta; season with salt and pepper.

For the salmon, I combined a little olive oil, a dash of white wine vinegar, the juice of half of a lemon, some dill, salt and pepper and put the salmon into some tin foil, made a pouch, poured the marinade over the salmon, wrapped it up really good and baked at 375 for about 15 minutes. It was perfect together and it would be a crime to eat this meal without a glass of good Chardonnay. So don’t let the name throw you off, replace that pasta side dish with a healthier bulgur alternative.

If you eat this without a glass of Chardonnay, you are committing a crime against food.

If you eat this without a glass of Chardonnay, you are committing a crime against food.

The possibilities here are endless – Greek bulgar salad with grilled chicken, feta, cucumbers, tomatoes and kalamata olives; bulgar and lentil salad with grapefruit vinaigrette, breakfast bulgar with maple syrup and baked apples . . . OK, I’m starting to sound like a bulgur growing Bubba from Forrest Gump. You get the picture.

Puttanesca party in my mouth

Every Sunday when I put together our meal plans for the week, I ask Jeremy if he wants anything in particular. For whatever reason, instead of hearing my request for something that he might want specifically,  he always seems to hear “name every kind of food you’ve ever heard of.” I don’t usually make anything he mentions.

But this past week when I asked him, he just said, matter-of-factly “plan ol’ spaghetti.” OK, that I can do. Or can I?…….

I had a recipe from one of my last issues of Everyday Food (the now defunct, monthly, food-only, small-format magazine put together by the people at Martha Stewart – it now lives on as a small insert with her monthly Living magazine) that I really wanted to try. The recipe was for how to make your own basic marinara sauce, then on the back side of the page it had several different add-in combinations that would make your sauce something amazing, beyond basic marinara. Ie – add diced celery, carrots, onions and ground sausage – bam, you’ve got Bolognese.

One of the options was to add three small ingredients: anchovies, kalamata olives, and capers. And bam – Puttanesca.

Puttanesca

Almost everything you need to be Italian. Or at least to make Puttanesca.

Almost everything you need to be Italian. Or at least to make Puttanesca.

Ingredients

  • 1/4 c. olive oil
  • 3 cloves of garlic, minced
  • 1 medium onion, diced
  • 3 anchovy filets
  • 3 tbs capers, drained and rinsed
  • 1/2 c. pitted kalamata olives, quartered
  • 1/2 tsp red pepper flakes
  • 1 28 oz can of whole, peeled tomatoes, pureed
  • Pasta of your choice

Method

  1. Heat the olive oil over medium heat in a large sauce pan and add the garlic, stirring until fragrant, then add the onion; sautee until very soft, 15 minutes. 
  2. Add the anchovies and mash with the back of a wooden spoon while stirring into the onions. Add the capers, olives and red pepper and cook an additional minute or two, until warmed through.
  3. Add the tomatoes, bring to a boil, then lower to a simmer and heat until thickened, 10 minutes or so.
  4. Meanwhile, cook the pasta (I used whole wheat, thin spaghetti) according to the box, but drain it one minute before it’s ‘al dente’ and add the drained pasta into the sauce and finish cooking the pasta in the sauce for 2-3 minutes until the pasta is tender and the dish is warmed through. Serve immediately with crusty bread and good olive oil.

And for those of you who don’t normally buy anchovies or don’t use them regularly, you will probably (like me) wonder what you do with the other dozen anchovies in the tin? Well, I researched it and according to many reputable websites, Italians store anchovies, packed in olive oil, on their counters all the time – they don’t even have to be refrigerated because they are so cured. But since I’m an American, I put the left over anchovies into a small glass container, covered with olive oil from the tin and my own, and then put it safely in my refrigerator. Apparently they are totally fine like that for months.  In this case, the fate of these anchovies is already determined for another fantastic recipe I have for tapenade, which I will happily share with you once I create it. It’s probably in my top five favorite things I make. And if you are scared of anchovies – don’t be. What they add is saltiness and oiliness. The flavor is subtle and if I never told you they were in there, you wouldn’t know. Don’t be afraid. Embrace their little, tiny deliciousness.

anchovies will keep,packed in olive oil, for months in the fridge

anchovies will keep,packed in olive oil, for months in the fridge

This dish was amazing. So simple, really, but so flavorful and it filled that desire for “plain ol’ spaghetti” but with a kick in the pants. Good suggestion, Jeremy . . .


Pantry Raid – Part III

I’m a little bit obsessed with Alton Brown and his show, Good Eats. I have the first two volumes of his Good Eats cookbooks, some DVDs and have seen almost every episode of the show. It’s kind of weird because in many ways, we are completely different cooks. Besides the fact that he is a famous chef and genius….he’s very precise and particular about the way his recipes are made and I’m . . . not. But something about his knowledge base and educational and visual illustrations of how cooking actually works is fascinating to me. After watching a show about cookies you feel like you just finished a course at Le Cordon Bleu….in a good way.

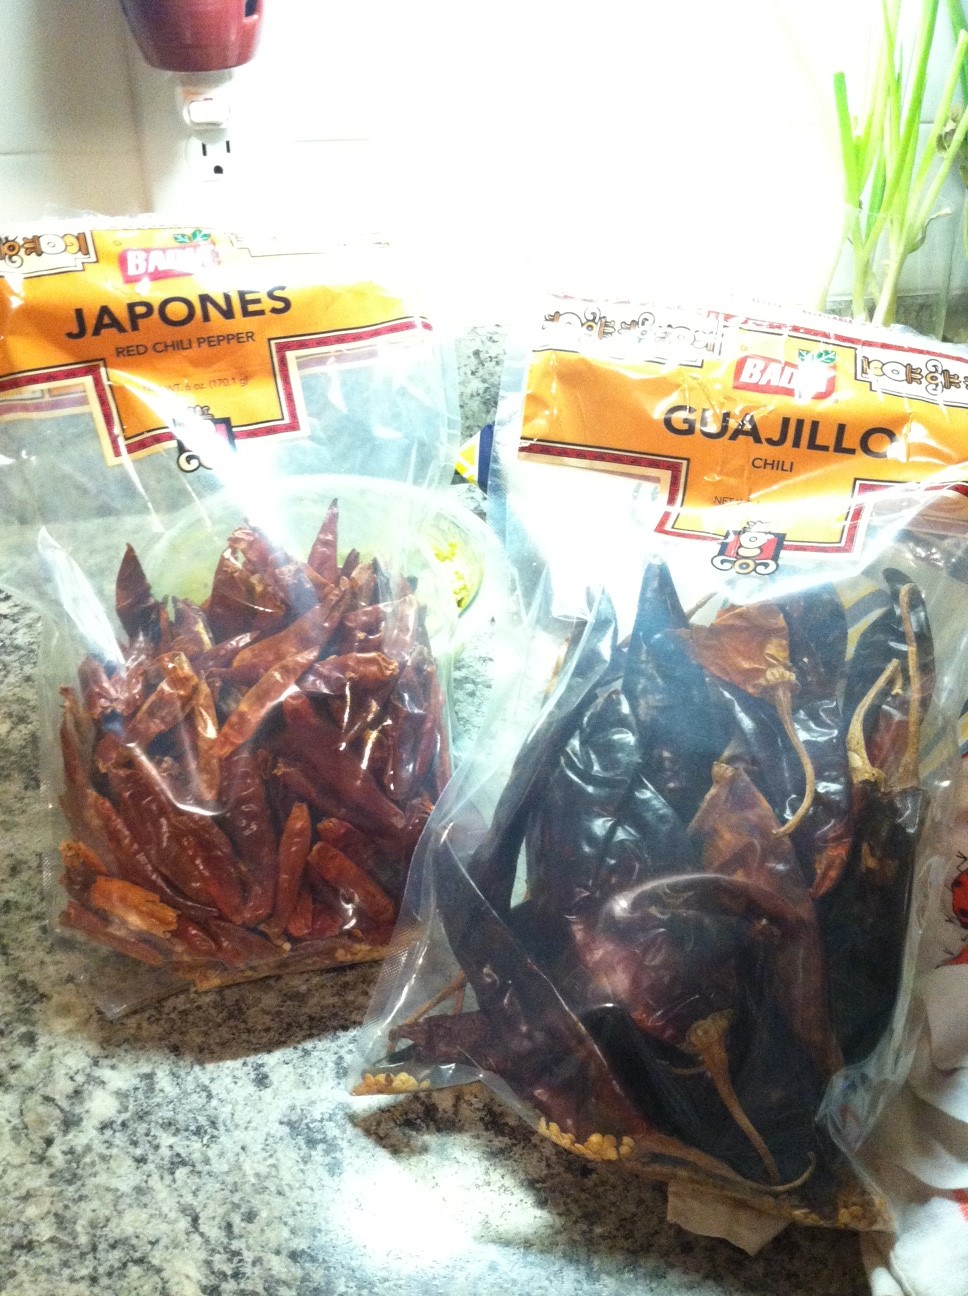
Anyways, he has a recipe for his own chili powder and “cowboy style” chili. This is the kind of chili that was really made out on the range – without beans or corn or potatoes or a lot of fluff. Just meat, stewed with chilies and tomatoes. I made this recipe for the first time a year or so ago, and because I wanted to make my own chili powder, like he does for his, I purchased two different kinds of dried chilies. Not the kind he suggested, because I couldn’t find them, and I’m not a perfectionist like him, but they were similar enough. The problem is, these bags of dried chilies (found in the “International” aisle of your grocery store) are HUGE. You only need about 9-12 chilies to make your powder, which leaves you with about 300 chilies. So, I decided I just needed to make this chili or at least my own chili powder, more often. The truth is, chili powder that is pre-bottled at the grocery store doesn’t really taste like much. It’s usually not very spicy and even if it is, it can lose its flavor quickly. This chili powder is pretty easy to make, and is incredibly flavorful and can be as spicy as you want it, depending on the chilies you use.

AB’s Chili Powder

Dried Chilies

Dried Chilies

Yield: approximately 3/4 cup

Ingredients

  • 3 ancho chiles, stemmed, seeded and sliced
  • 3 cascabel chiles, stemmed, seeded and sliced
  • 3 dried arbol chiles, stemmed, seeded and sliced
  • 2 tablespoons whole cumin seeds
  • 2 tablespoons garlic powder
  • 1 tablespoon dried oregano
  • 1 teaspoon smoked paprika

Directions

  1. Place all of the chiles and the cumin into a medium nonstick saute pan or cast iron skillet over medium-high heat. Cook, moving the pan around constantly, until you begin to smell the cumin toasting, approximately 4 to 5 minutes. Set aside and cool completely.
  2. Once cool, place the chiles and cumin into the carafe of a blender along with the garlic powder, oregano, and paprika. Process until a fine powder is formed. Allow the powder to settle for at least a minute before removing the lid of the carafe. Store in an airtight container for up to 6 months.

I used six Guajillo chilies and three Japones. Usually the bags rate the chilies in spiciness on a 5 chili scale, so you can just purchase whatever heat intensity you prefer.

Once you have your chili powder made, you’re read to make the actual chili. His original recipe calls for a pressure cooker, but you can use a Dutch Oven, it will just take a bit longer. The instructions below are for using a large, cast iron Dutch oven.

AB’s Cowboy Chili

Cowboy Chili

Cowboy Chili

Ingredients

  • 3 pounds stew meat (beef, pork, and/or lamb)
  • 2 teaspoons peanut oil
  • 1 1/2 teaspoons kosher salt
  • 1 (12-ounce) bottle of beer, preferably a medium ale
  • 1 (16-ounce) container salsa
  • 30 tortilla chips
  • 2 chipotle peppers canned in adobo sauce, chopped
  • 1 tablespoon adobo sauce (from the chipotle peppers in adobo)
  • 1 tablespoon tomato paste
  • 1 tablespoon chili powder
  • 1 teaspoon ground cumin

Directions

  1. Place the meat in a large mixing bowl and toss with the peanut oil and salt. Set aside.
  2. Heat a large, cast iron Dutch Oven over high heat until hot. Add the meat in 3 or 4 batches and brown on all sides, approximately 2 minutes per batch. Once each batch is browned, place the meat in a clean large bowl.
  3. Once all of the meat is browned, add the beer to the pot to deglaze the pot.
  4. Scrape the browned bits from the bottom of the pot. Add the meat back in along with the salsa, tortilla chips, chipotle peppers, adobo sauce, tomato paste, chili powder, and ground cumin and stir to combine. Put the lid on top and put into a 375 degree oven for two hours, stirring every thirty minutes. Serve with preferred toppings.
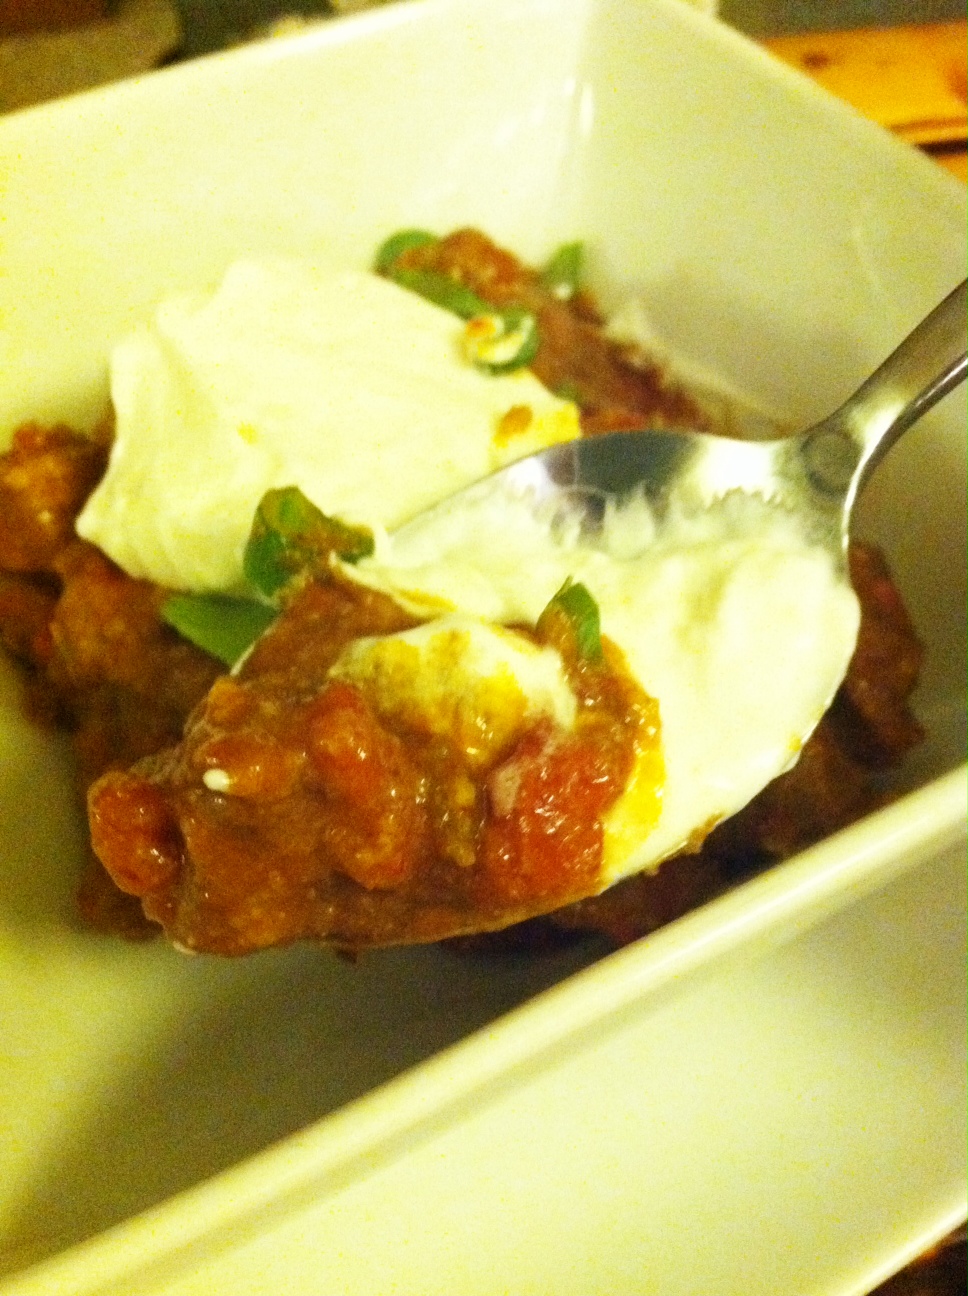
Cowboy Chili

Mmmmm…..chili

This recipe helped me use up a few things in my cabinet: the chilies for the chili powder, some left-over taco shells, which I crushed and used in place of the tortilla chips, a batch of homemade salsa that had been in the freezer since the summer and some chipotle peppers/adobo I had saved in the freezer. I need these more often than you’d think, but I always only need one or two at a time and usually one small can has about 5 or 6 and cost like $3. No point in wasting them – just freeze the remainder of the can and use at will. I also used local, grass-fed beef from Windhaven Farms which, of course, was delicious. Their “stew beef” pack was the perfect type of beef for this.

This chili is serious. It’s not your average American beans and corn and relatively mild type of thing. And don’t get me wrong – I love those kinds of chilis also, but if you want something really hearty and really filling and really classic, this is the way to go. I topped mine with plain, nonfat Greek yogurt (in place of sour cream), sliced green onions and cilantro. Chopped onions would also be nice, or a wedge of lime, or cheese if you want to go all out, although AB swears the only acceptable toppings are onions and cilantro. But again, I’m no perfectionist . . .