Snow Day Soup

If you live pretty much anywhere on the east coast of the country above South Carolina, you are probably experiencing some snow today. In southeastern Virginia, we started getting snow yesterday afternoon and through the night. And if there’s anything that below freezing temperatures and a few inches of snow makes you want, it’s soup. A certain soup company has made like a zillion dollar or something on this concept. Ehhh?

Please don't sue me for the unauthorized use of this picture, soup company!

Please don’t sue me for the unauthorized use of this picture, soup company!

So last night I got the soup pot fired up, but unlike this creepy snowman kid, I did not turn to the standard snow day soup . . .

Move over, Chicken Noodle – there’s a new soup in town!

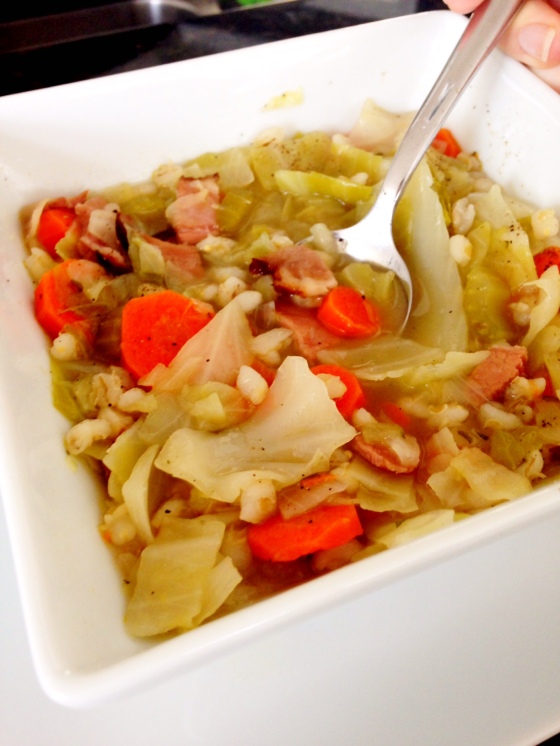
Ham & Cabbage Soup

ham and cabbage soup

Ingredients:

  • 6 cups of chicken broth (I used my homemade crockpot chicken broth)
  • 1 onion, diced
  • 5-6 medium carrots, diced
  • 1 small head of cabbage, chopped
  • 1/2 cup of pearled barley
  • 1/2 – 1 lb ham, diced
  • 1 tsp garlic powder
  • 1 tbs dried parsley
  • salt and pepper to taste

Method:

  1. Add all the ingredients to a large, heavy stockpot, bring it to a boil, then reduce to low and simmer for 1.5 hours. Soup is ready when carrots and cabbage are tender and barley has fluffed and cooked through.

A quick note about the ham. You can use any kind of ham you want here – I made this soup because I had a little less than a pound of Honeybaked Ham (on the bone) left over from a brunch. I usually make this soup with a salted, country style ham to give the soup the saltiness I like. But if you prefer sweet ham and don’t need or want your soup to be salty, then use that. Another note that the cabbage, carrots and onions came from our Winter CSA that we are getting from Cullipher Farm. Yes, there is fresh, local produce available in the winter! In addition to those ingredients we also got potatoes, kale, turnips and collards in our box last week.

This soup is very filling thanks to the barley. Barley is a whole grain that is high in fiber, which means it helps with digestion, can lower cholesterol, keep blood pressure low and reduce the risk of type 2 diabetes. Barley is more effective at all of these things than whole oats, so it’s a good substitute every once in awhile. For those with diabetes, pearled barley has the lowest glycemic index of all the common cereal grains (such as wheat, rye, oats, etc). This means that even though it is a carbohydrate, it won’t raise your blood sugar as much as other carbs. It’s glycemic index (when boiled) is 35.

Additionally, carrots, cabbage and onions provide a wide variety of nutrients from Vitamins K and C to powerful antioxidants that protect our bodies against a host of things, including cancer. So while chicken noodle soup might ward off a cold, this soup is fighting cancer. And with high fiber barley rather than high-glycemic noodles, to boot. So make a bowl and sit back and enjoy the snow.

Chili my way

We broke a record low overnight last night in Hampton Roads – 58 degrees. That is COLD for August in southeastern Virginia and when I woke up this morning and stepped out on the back porch, the instant the sub-60 degree temperate hit me, I knew we had to have chili for dinner. Does anyone else have these instantaneous food triggers? Jeremy will vouch for the fact that I CANNOT listen to mariachi music without immediately needing a taco. Like, if I hear it on TV or out in public I will literally stick my fingers in my ears and go “lalalalalala” if I think there’s any chance I can’t immediately acquire a taco. This is how I am with chili. I can go months and months without thinking about it and then a cool breeze will come out of somewhere or maybe someone is burning yard debris or ANYTHING that seems like fall and I cannot rest until there is chili.

As we all know there are about a billion ways to make and eat chili and everyone from every part of the country will swear that their way is the right/legitimate/original/best way to make it. Fine, sure. It is. But the truth is, MY WAY IS THE BEST WAY SO SHUT UP.

Rachel’s Chili

(eat it or get out)

chili bowl - rlb

Ingredients:

  • 1 lb of ground turkey
  • olive oil
  • one onion
  • two cloves of garlic, minced
  • one 15oz can of kidney beans, drained
  • one 15 oz can of chili beans, drained
  • one 14 oz can of tomato sauce (or home made)
  • one 14oz can of crushed tomatoes
  • one can of beer (minus two swigs for yourself)(actually, take three swigs)(just put in whatever is left)
  • 1/8 cup of chili powder
  • 1/2 tbs cumin
  • 1 tsp coriander, crushed
  • 1/2 tsp cayenne or hot sauce or more if you like it spicy

Optional Toppings:

  • diced onions
  • chopped cilantro
  • shredded cheese
  • lime wedges
  • sour cream or plan Greek yogurt
  • avocado slices
  • crushed tortilla chips
  • crushed saltines

Method:

  1. In a large skillet heat the oil, sautee the onion and the garlic until soft
  2. Add the turkey and cook until browned. Drain any excess fat.
  3. Put the turkey mixture and remaining ingredients into a slow cooker and cook on low for 8 hours OR put all ingredients into a Dutch oven and cook over low heat on the stovetop for 3 hours.

I prefer using a slow cooker with chili because chili is just one of those things that gets better the longer it sits. I would even recommend making this the day before you’re going to serve it (The Saturday before game day, maybe?) but for me it’s too hard to make it and not eat it the same day, but do whatever your internal fortitude allows you to do. You can see by my beer recommendations, that mine is incredibly low.

chili toppings

And of course there are the chili toppings! I like to lay them all out and let everyone decide what they want. My must haves are plain Greek yogurt and shredded cheese with a squeeze of lime. This is the one part I’ll let you decide for yourself what is best.


Pantry Raid – Part III

I’m a little bit obsessed with Alton Brown and his show, Good Eats. I have the first two volumes of his Good Eats cookbooks, some DVDs and have seen almost every episode of the show. It’s kind of weird because in many ways, we are completely different cooks. Besides the fact that he is a famous chef and genius….he’s very precise and particular about the way his recipes are made and I’m . . . not. But something about his knowledge base and educational and visual illustrations of how cooking actually works is fascinating to me. After watching a show about cookies you feel like you just finished a course at Le Cordon Bleu….in a good way.

Anyways, he has a recipe for his own chili powder and “cowboy style” chili. This is the kind of chili that was really made out on the range – without beans or corn or potatoes or a lot of fluff. Just meat, stewed with chilies and tomatoes. I made this recipe for the first time a year or so ago, and because I wanted to make my own chili powder, like he does for his, I purchased two different kinds of dried chilies. Not the kind he suggested, because I couldn’t find them, and I’m not a perfectionist like him, but they were similar enough. The problem is, these bags of dried chilies (found in the “International” aisle of your grocery store) are HUGE. You only need about 9-12 chilies to make your powder, which leaves you with about 300 chilies. So, I decided I just needed to make this chili or at least my own chili powder, more often. The truth is, chili powder that is pre-bottled at the grocery store doesn’t really taste like much. It’s usually not very spicy and even if it is, it can lose its flavor quickly. This chili powder is pretty easy to make, and is incredibly flavorful and can be as spicy as you want it, depending on the chilies you use.

AB’s Chili Powder

Dried Chilies

Dried Chilies

Yield: approximately 3/4 cup

Ingredients

  • 3 ancho chiles, stemmed, seeded and sliced
  • 3 cascabel chiles, stemmed, seeded and sliced
  • 3 dried arbol chiles, stemmed, seeded and sliced
  • 2 tablespoons whole cumin seeds
  • 2 tablespoons garlic powder
  • 1 tablespoon dried oregano
  • 1 teaspoon smoked paprika

Directions

  1. Place all of the chiles and the cumin into a medium nonstick saute pan or cast iron skillet over medium-high heat. Cook, moving the pan around constantly, until you begin to smell the cumin toasting, approximately 4 to 5 minutes. Set aside and cool completely.
  2. Once cool, place the chiles and cumin into the carafe of a blender along with the garlic powder, oregano, and paprika. Process until a fine powder is formed. Allow the powder to settle for at least a minute before removing the lid of the carafe. Store in an airtight container for up to 6 months.

I used six Guajillo chilies and three Japones. Usually the bags rate the chilies in spiciness on a 5 chili scale, so you can just purchase whatever heat intensity you prefer.

Once you have your chili powder made, you’re read to make the actual chili. His original recipe calls for a pressure cooker, but you can use a Dutch Oven, it will just take a bit longer. The instructions below are for using a large, cast iron Dutch oven.

AB’s Cowboy Chili

Cowboy Chili

Cowboy Chili

Ingredients

  • 3 pounds stew meat (beef, pork, and/or lamb)
  • 2 teaspoons peanut oil
  • 1 1/2 teaspoons kosher salt
  • 1 (12-ounce) bottle of beer, preferably a medium ale
  • 1 (16-ounce) container salsa
  • 30 tortilla chips
  • 2 chipotle peppers canned in adobo sauce, chopped
  • 1 tablespoon adobo sauce (from the chipotle peppers in adobo)
  • 1 tablespoon tomato paste
  • 1 tablespoon chili powder
  • 1 teaspoon ground cumin

Directions

  1. Place the meat in a large mixing bowl and toss with the peanut oil and salt. Set aside.
  2. Heat a large, cast iron Dutch Oven over high heat until hot. Add the meat in 3 or 4 batches and brown on all sides, approximately 2 minutes per batch. Once each batch is browned, place the meat in a clean large bowl.
  3. Once all of the meat is browned, add the beer to the pot to deglaze the pot.
  4. Scrape the browned bits from the bottom of the pot. Add the meat back in along with the salsa, tortilla chips, chipotle peppers, adobo sauce, tomato paste, chili powder, and ground cumin and stir to combine. Put the lid on top and put into a 375 degree oven for two hours, stirring every thirty minutes. Serve with preferred toppings.
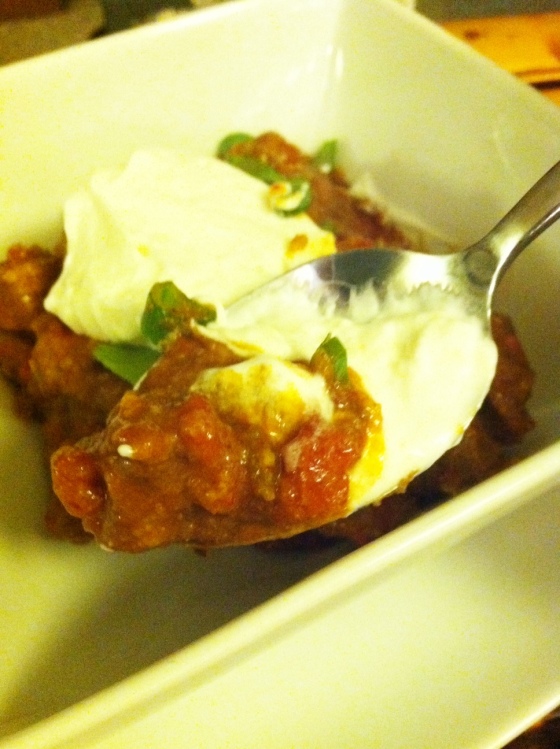
Cowboy Chili

Mmmmm…..chili

This recipe helped me use up a few things in my cabinet: the chilies for the chili powder, some left-over taco shells, which I crushed and used in place of the tortilla chips, a batch of homemade salsa that had been in the freezer since the summer and some chipotle peppers/adobo I had saved in the freezer. I need these more often than you’d think, but I always only need one or two at a time and usually one small can has about 5 or 6 and cost like $3. No point in wasting them – just freeze the remainder of the can and use at will. I also used local, grass-fed beef from Windhaven Farms which, of course, was delicious. Their “stew beef” pack was the perfect type of beef for this.

This chili is serious. It’s not your average American beans and corn and relatively mild type of thing. And don’t get me wrong – I love those kinds of chilis also, but if you want something really hearty and really filling and really classic, this is the way to go. I topped mine with plain, nonfat Greek yogurt (in place of sour cream), sliced green onions and cilantro. Chopped onions would also be nice, or a wedge of lime, or cheese if you want to go all out, although AB swears the only acceptable toppings are onions and cilantro. But again, I’m no perfectionist . . .


Pinterest Perfection

I’m sure many, if not most, of you have heard of Pinterest. I first heard about this little site where you could “curate” your own visual boards over two years ago when the site was still in Beta testing. I did some quick researchpinterest-logo on the trusty interwebs and lo and behold, I was able to track down the Pinterest CEO to his person twitter page, where I began a barrage of direct messages begging for a beta tester invite. I got it. His name is Ben, by the way, and he’s super nice. I was one of the first few thousand people to use the site, and use it I did. I currently have over 30 boards, 981 pins and 125 followers. When Pinterest first started it was much more of an art and design crowd. The cool kids who were developing the site had no doubt invited their other cool kid friends who I’m sure were all interior designers, graphic artists, and web developers in San Francisco (that’s where the company is based, not the valley, which is why the site and its people are so cool) to give it a whirl. As Beta opened up to user invites, and the site became a real, live thing, it became much, much, much more crafty, crock potty and crap to do with your kidsy. But you know what? I still love it. Despite the fact that I have to sift through hundreds of pins of maternity photo sessions to get to the thing I’m looking for, despite the fact that when I search the food category I have to ignore a million recipes that suggest throwing four different kinds of canned Campbell’s crap into your slow cooker and feeding it to your family of 10 for less than .30  cents a serving, I still think it is an awesome, amazing thing. And every once in awhile, you run across some real gems.

On Wednesday of this past week, I made THREE recipes for one meal that I found on Pinterest: A Roasted Garlic salad dressing, a rosemary and Parmesan overnight bread, and an Italian style beef and butternut squash stew. They were all the kind of things that keep me obsessed with the site. Diamonds in the rough.

The Roasted Garlic Vinaigrette is a MUST try to anyone who loves garlic on the level that I do. Two heads of garlic go into this dressing. And while you do have to roast the garlic for a good half hour, the dressing itself is really easy to make, and you probably have most of the ingredients on hand. I’m currently obsessed with making my own salad dressings and have tried several I’ve found on Pinterest, but this one is my favorite.

From Fat Girl Trapped in a Skinny Body:

Roasted Garlic Vinaigrette
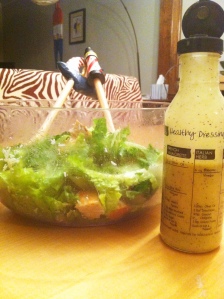
pinterest meal salad dressing

Ingredients:

  • 2 heads of garlic, roasted and peeled
  • 1/2 cup extra virgin olive oil
  • 1/4 cup apple cider vinegar
  • 2 tbsp lemon juice
  • 1/2 tsp kosher salt
  • 1 tsp black pepper
  • 1 tbsp honey

Method:

  1. Cut the pointy top off of the garlic. Brush them with olive oil and roast them in a pan in the oven at 400 degrees for about 25 minutes, until it is starting to turn golden brown and soft. Remove from the oven, allow to cool. Once the garlic is cool, peel the skin off. Discard the skins, save the garlic. *Skin peels off really easily after they are roasted.
  2. Add all the ingredients to the food processor and process until smooth. Refrigerate until ready to serve.*If some of the skin get processed with the rest of the dressing, no big deal, it won’t change the flavor.

The salad dressing can be vegan if you sub the honey for agave. And it is dairy free, with no substitutions!

This dressing is tangy, but has that deep, rich caramelized taste from the roasted garlic. It’s a vinaigrette, but it’s creamy because of the garlic being processed right into it. Keep this for a week or so in your fridge in a covered container.

The bread recipe I comes from Simply So Good. I used her basic bread recipe, and put in my own additions. This bread is baked in your cast-iron enameled Dutch Oven (you have one of those, right??). I have a big, blue Le Creuset that is the Pride and Joy of my kitchen. Jeremy gave it to me for Christmas a few years ago. They are usually in the $300-$400 range, but sometimes you can score them at T.J. Maxx for half the price, which I believe is what he did (smartly). Other cast-iron enameled pots are fine for this recipe also, but when you have a Le Creuset, you tend to brag about it. Here is a view down on mine to give you an idea of the size of the vessel you might want to use:

I ❤ Le Creuset

OK, enough about my awesome piece of iron. Here’s the recipe.

Crusty Bread

Crusty Overnight Bread

Crusty Overnight Bread

Ingredients:

  • 3 cups unbleached all purpose flour
  • 1 3/4 teaspoons salt
  • 1/2 teaspoon yeast
  • 1 1/2 cups water

 Method:

  1. In a large mixing bowl, whisk together flour, salt and yeast.  Add water and mix until a shaggy mixture forms.  Cover bowl with plastic wrap and set aside for 12 – 18 hours.  Overnight works great.
  2. Heat oven to 450 degrees.  When the oven has reached 450 degrees place a cast iron pot with a lid in the oven and heat the pot for 30 minutes.  Meanwhile, pour dough onto a heavily floured surface and shape into a ball.  Cover with plastic wrap and let set while the pot is heating.
  3. Remove hot pot from the oven and drop in the dough.  Cover and return to oven for 30 minutes.  After 30 minutes remove the lid and bake an additional 15 minutes.  Remove bread from oven and place on a cooling rack to cool.

To this recipe, I added 1/4 cup of fresh grated Parmesan Cheese, 1/8 cup of fresh rosemary (from my garden), and several cloves of smashed and roughly chopped garlic. I added that in to the dough at the very beginning and then proceeded as normal through the recipe.
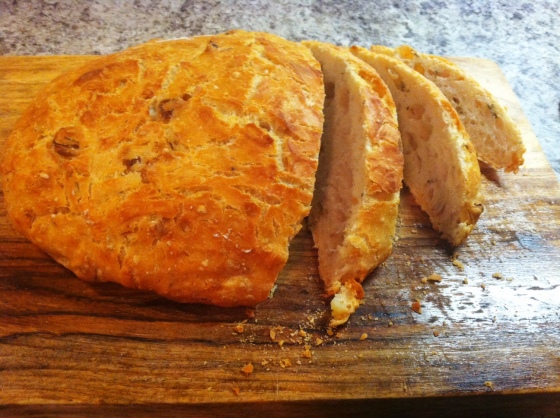
pinterest meal bread cut

This thing turned out beautiful. There is nothing quite like making your own bread from scratch and this is really a pretty easy way to do it.

Finally, the main course – Beef and Butternut Squash Stew from Closet Cooking. I’ll be honest and say there are a few things wrong with the way this original recipe is written, so the recipe below has a few very minor changes from myself, just to make things more clear.

Italian Style Beef and Butternut Squash Stew

pinterest meal stew 2


Ingredients:

  • 2 ounces pancetta (diced)
  • 1 pound beef (cut into 1 inch cubes) (My Note: he doesn’t specify what kind of beef to use here. My suggestion is to get a sirloin roast, if you can find one – that’s what I used. Otherwise a small round roast is fine or chuck if nothing else is available)
  • 1 onion (chopped)
  • 3 cloves garlic (chopped)
  • 1/2 teaspoon red pepper flakes (optional, to taste)
  • 1 tablespoon rosemary (chopped)
  • 1 tablespoon thyme (chopped)
  • 1 cup Italian red wine (My Note: I used a Zinfandel. It doesn’t have to be Italian, don’t stress out, just use a decent red wine that’s not sweet)
  • 3 cups beef broth
  • 1 splash balsamic vinegar
  • 1/4 cup sundried tomatoes (chopped)
  • 1 (28 ounce) can diced tomatoes (My Note: He doesn’t specify drained vs. undrained. Because he does not, I put them in without draining them. It gave my stew a more “soupy” consistency, which I was OK with. If you want this to be more like a traditional stew, then drain the tomatoes before adding).
  • * parmigiano reggiano rind (optional)
  • 1 teaspoon oregano
  • salt and pepper to taste
  • 1 pound butternut squash (peeled, seeded and cut into 1 inch cubes)
  • parsley (chopped) (My Note: optional for garnish. I used a bit of grated Parmesan instead).

Method:

  1. Cook the pancetta in a large pan on medium heat. (My Note: or Dutch Oven. Again, with my Creuset)
  2. Add the beef and brown on all sides in the grease from the pancetta and set aside. (My Note: I coated the beef cubes in flour first. I’ve always done this when searing beef that is basically going to be braised later. It also helps to thicken the sauce a bit, but it’s up to you).
  3. Add the onion and saute in the pancetta grease until tender, about 5-7 minutes.
  4. Add the garlic, red pepper flakes, rosemary and thyme and saute until fragrant, about a minute.
  5. Add the wine and deglaze the pan. (My Note: deglazing means you add a liquid to absorb the browned bits from the pancetta, beef and aromatics. When you add the wine to the hot pan, it will steam up. Take a wooden spoon and use that moment to scrape up all the bits in the bottom of the pan, stirring them into the liquid to create a flavorful base).
  6. Add the beef, broth, balsamic vinegar, sun-dried tomatoes, diced tomatoes, parmigiano reggiano rind, oregano, salt and pepper and bring to a boil.
  7. Reduce the heat, cover and simmer until the beef is nice and tender, about 1-2 hours.
  8. Add the squash and simmer until it is tender, about 15-20 minutes. (My Note: more like half an hour, at best).

This stew was filling, hearty and really quite healthy. Serve it with a glass of the same wine you used in the soup – superb! Always cook with wine that is good enough to drink. When you cook with wine, you are cooking off the alcohol, but intensifying the flavor. If you intensify a crappy wine, you will just get really intense crap. No Bueno.

Pinterest Perfection

Pinterest Perfection

The dressing, served over a bed of Organic romaine lettuce, the garlic, rosemary and Parmesan bread and this stew altogether? Perfection. Pinterest Perfection.