Liebster Blog Award

Maple Avenue Juice nominated me for this blog award, which was great because I didn’t know about her blog until she nominated me, so now I have a new blog buddie who posts some pretty awesome juice recipes. Check her out.

liebster award

So, the Liebster Blog Award is actually not an award, but rather a good way to build community, connect with other bloggers and generate attention for newer bloggers. Here are the rules:

▪   Acknowledge the nominating blogger
▪   Answer 11 questions the nominating blogger has created for you
▪   List 11 random facts about yourself
▪   List some bloggers with fewer than 200 followers that you really feel deserve a little blogging love!
▪   Let all of the bloggers know you have nominated them. You cannot nominate the blogger that nominated you!
▪   Post 11 questions for the bloggers you have nominated to answer

Questions from Maple Avenue Juice:

  1. What was the last meal you had?
    I just ate some left-over quinoa, black bean, avocado and tomato salad. It’s one of my favorite dishes.
  2. What are 2 or 3 your favorite non-fiction health/wellness books?
    Animal, Vegetable, Miracle by Barbara Kingsolver; The Omnivore’s Dilemma by Michael Pollan
  3. What is a post on your blog that you are really proud of?
    Apparently my “One Pan Wonder” blog is kind of huge on Pinterest – who knows why – it’s definitely not my best recipe. The one I’m probably most proud of is my crock pot rib recipe, because let’s be honest – cooking perfect fall-off-the-bones ribs makes you feel like a badass.
  4. Who/What inspires you most on your ‘healthy living’ journey?
    The idea of a long, healthy life inspires me. There are so many places I want to see, so much traveling I want to do, so many experiences I want to have – all of those things are dependent on my health, so I take it very seriously.
  5. What is your favorite kitchen appliance?
    My blender. I have a Breville Hemisphere, which I highly recommend.
  6. Name your top 5 favorite fruits and/or vegetables?
    1. Beets (duh) 2. Kale 3. Cucumbers 4. Avocadoes 5. Tomatoes (obviously I prefer veggies to fruit)
  7. Where do you feel the most relaxed/still/at ease?
    The beach.
  8. What is your favorite holiday and why?
    I love Christmas because it’s the one time of the year I get to see my whole, huge family all in one place. That changes as you get older, and I don’t always get to see them every year, but when I do it’s magic.
  9. What is the most funny/silly/embarrassing thing you’ve said or done?
    One time I did “stand up comedy” on a tour bus in Mexico. Tequila and Mexican cowboys were involved, so…yeah.
  10. What is your favorite workout/physical activity/exercise routine?
    I love yoga, but can’t live without lifting weights and my elliptical.
  11. What is your main ‘healthy living’ goal for 2014?
    I’m going to Hawaii in November, and my goal is to climb the Haiku Stairs (aka “stairway to heaven“) in Oahu. It’s technically illegal, so who knows if I’ll get to – but I’m exercising in preparation for doing it – just in case.

11 Random Facts About Me:

  1. I have two pugs named Winston and Clementine. Very few people realize they are named after Winston and Clementine Churchill, who also had a pug named “Mr. Pug”
  2. I’ve known my husband for 25 years – we met when I was 3 and he was 5.
  3. I have a large scar on my left hand from cutting it while creating a robot when I was 9. Best believe I finished that robot when I got home from the hospital with over a dozen stitches.
  4. Although I love being a professional writer, I hate sitting still. My days are a struggle as I force myself to sit down to do the one thing I love to do when there’s just so much pacing to be done.
  5. Growing up I wanted to be an actress and sometimes still do, but am mostly glad I can go into Target without makeup on and no one knows who I am.
  6. I keep my friends forever – I have some friends I’ve had since (literally) the day I was born, some still from elementary, high school and college. Once I find someone I like, I cling on like a barnacle.
  7. I love to travel, but I consistently get home sick after four days. The only exception was when my husband and I went to Napa and there was just too much wine for anyone to want to go home.
  8. I am using this blog as a way to procrastinate on a very important writing project I have yet to begin.
  9. I love cooking for me and my husband, but cooking for any more than two people gives me major anxiety.
  10. My Meyers-Briggs personality type is INTJ, which is the rarest personality type for women – less than 1% of women fall into that type. (According to my husband, that actually qualifies it as a personality disorder, not a personality type…)
  11. I minored in Psychology in undergrad and if I had all the time and money in the world, I’d go back and finish a BS, MS and PhD in it.

OK! Now to nominate. So, I’m a really horrible community blogger and I really only read one other food blog very consistently, and that is Whisks and Words. Dana, no pressure! If you’d like to, please accept this award and answer the following questions:

  1. What brought you to cooking?
  2. What brought you to writing?
  3. When was it clear to you that you wanted to merge your two passions?
  4. What has been your best moment in food writing?
  5. What’s your best advice for others in the food writing “industry”?
  6. What is, hands down, your favorite thing to eat?
  7. What is, hands down, your favorite thing to COOK (I know that for me these are two very different things)?
  8. You were recently interviewing folks about food documentary “fall out” – what’s your personal philosophy on food, food safety and ethics?
  9. What can you never pass up at the farmers market?
  10. If calories were no issue, I would binge on ___________?
  11. Your favorite quote about food, cooking or eating.

Thanks again to Maple Avenue Juice for the shout out!

Green Goddess

The winter gets me down. I’m not a cold weather, snow loving kind of gal. I exist in a tiny percentage of people who actually don’t mind the swamp-like humidity of the south. I thrive in that. When the air gets dry and cold, my sinuses dry up, my nose starts bleeding and I get never-ending headaches. I also can’t sleep at night (or during the day) and, without exaggerating all that much, pretty much lose all of my ability to function. I also, believe this or not, lose my appetite. While most people seem to go into hibernate, stuff-your-face mode in the winter, I can barely think about food without just getting exhausted. These are dark times.

But. I have a solution.

Green Goddess Juice at I Heart Beets

Green Goddess Juice

Ingredients:

  • 1/2 cup of fresh pineapple, chopped
  • 1/2 cup mango (fresh or frozen)
  • 1 scoop of protein powder – vanilla flavored
  • 3 large kale leaves, stems removed
  • 1 tsp fish oil (flavored is best here)
  • 3/4 cup orange juice
  • 3/4-1 cup water

Method:

  1. Add all the ingredients to a blender. Use as much or as little water as you need to make it blend properly. This takes some experience and knowledge of your blender. I use a Breville Hemisphere blender – it’s on par with the Vitamix and is less than 1/2 of the cost. (you can watch an excellent review of it via America’s Test Kitchen on YouTube) It has a smoothie and a “liquify” option. I blend on the smoothie setting for 30 seconds, then on the liquify option for one minute. And there you have it – juice.

What’s great about this juice is that it’s covering a lot of bases for those of us who can’t seem to stomach the idea of solid food. It’s got iron, potassium, protein, complex carbs, vitamin C, Vitamin D (via the fish oil, which is what we are all lacking in the winter and need so desperately) and a whole host of other nutritious stuff. When I make this in the morning, I don’t even need coffee. *gasp* right??

Now, I’m a firm believer in equipping your kitchen with the right tools. I don’t believe in unitaskers or novelty kitchen items, ie, the “butter cutter” – because……you can’t just cut butter with a knife???

butter cutter

So what I’m saying is, if you don’t have a quality blender, buy one. I suffered through too many years of trying to make smoothies and juices in a sub-par blender. My mom and dad got me the Breville this year for my birthday when my rinky-dink “blender” finally offed itself by wrapping its rubber stopper around its own blades in the middle of blending a protein shake (it knew its time was coming to an end one way or another – for this, I respect it for going out on its own terms).

I would never shell out the $450 or $700 for a Vitamix and I would never recommend anyone else do it either, so whenever I’m looking for a good, quality, long-lasting piece of equipment for my kitchen, I always reference America’s Test Kitchen first – they have dozens of chefs who are doing the testing, breaking, and upfront buying for you.  Although the Breville was still a $200 investment (thanks, mom and dad!), I firmly believe it’s worth it in the long run to avoid the hassle, frustration, breaking, replacing and everything else that comes with an inferior product. Plus, it’s winter – I can barely remember what day of the week it is and whether or not I fed my dogs yet today, let alone deal with a crappy blender.

EDIT AND UPDATE: It should be noted that the kale here came from a US Certified Organic Farm on the Eastern Shore of Virginia, Mattawoman Creek Farms. Kale is one of the “dirty dozen” – 12+ fresh produce items that contain the highest amounts of chemical pesticide and herbicide residue. Buying these 12 items as certified organic from the grocery store is a good idea. Or if you buy your produce locally, just ask your farmer what their growing methods are to ensure you’re not reversing the good effects of the produce with the negative effects of chemicals. For those who don’t want to splurge on local or  organic produce, get your priorities straight, then take a look at the “clean 15” list of traditionally grown produce that suffers the least chemical compromise.

The Secret to Life is Soup

Soup is the secret to life because it’s simple, hearty, enjoyable, shareable, saveable, warming, nurturing. Nobody ever wrote Chicken Satay for the Soul and nobody ever will. The secret to life is something that is easy to make, something that can be done while you live your actual life, something that can bring people together and then when enjoyed later can bring them right back to that same place.

Soup is particularly great this time of year because it can be a breeze to make for a big crowd, then you save your left overs for when you’re too busy to cook one night (you know, like, every night until January). This soup is one of my favorites that I’ve been making for years because it is SO SO simple, low-cal/fat and stores really well. You could even make big batches, freeze, then thaw as needed.

So make this soup so you can stop standing over the stove, worrying about what you’re making/missing/buying/gifting/planning/doing and just go sit by the fire or the tree or someone you love and share some soup.

Stupid Simple Salsa and Black Bean Soup

black bean soup 1

Ingredients:

  • 1 can of black beans, drained and rinsed
  • 1 cup of salsa
  • 1 cup of vegetable or chicken broth
  • 1 tsp cumin
  • 1 tsp chili powder
  • salt, pepper and cayenne pepper, to taste
  • Optional toppings: plain Greek yogurt, cilantro, chopped onions, sliced green onions or chives

Method:

  1. Combine the beans, salsa and broth in a blender and pulse until smooth, or put all the ingredients it a stock pot and blend with an immersion blender.
  2. Add the spices to taste and allow soup to warm to a simmer.
  3. Reduce heat and let warm on the stove top for 20-30 minutes to let the flavors combine.
  4. Serve warm with optional toppings.

black bean soup 2

Super Food: the case for sardines

We’ve all heard the term “super foods” being thrown around a lot lately – it seems there’s a new one every week. Something exotic, often expensive and difficult to find, but that without incorporating into your daily diet, you will most certainly die of a rare disease by your early 20’s. If you’re older than that, then you are actually already dead for lack of pomegranate seeds.

But today I want to make a case for a super food that’s a little less pedantic: the humble, lowly sardine.

Sardine Superfood

Sardine Superfood

The sardine is a super food for many reasons, but for me the primary reason is its accessibility and cost. A good tin of sardines is available at nearly every grocery store for less than $3. Sardines, which are actually not a type of fish, but rather a way of curing and packing fish, are often brisling – a small, Norwegian fish. These fish are packed full of Omega-3’s, which I’ve talked about before, but to review, Omega-3’s reduce inflammation in the body. Inflammation being a major source of illness from high blood pressure to heart disease, stroke, Alzheimer’s and more.  Omega-3’s are not something our bodies naturally produce – they must be consumed through diet. Yes, you can take a supplement, but remember supplements are meant to do just that – supplement a healthy diet, not replace it. In fact many vitamins and nutrients are not naturally absorbed by our bodies in pill or liquid form, such a calcium, which can only be absorbed if we are taking in the proper amount of Vitamin D through diet and outdoor exercise. I could go on here, but the point is – eat to be healthy, supplement if you must, but understand that food is always the best medicine when taken correctly.

In addition to being chock full of those Omegas, sardines are full of calcium – they are actually one of the highest non-dairy calcium foods around (because of their soft, edible bones, but don’t let that scare you away – I promise you do not notice the bones.) Sardines contain loads of protein, vitamin D and are sustainable (they’re not over-fished) and for those concerned about their fish intake – sardines have a lowest amount of mercury of just about any fish you can buy because they are at the bottom of the food chain. The bigger the fish, the higher the mercury level.

So here’s a great introductory recipe to sardines – Jeremy and I made this for breakfast on Sunday and it kept us full for HOURS. We didn’t eat again until 3pm that afternoon. And just one more note – sardines equal anchovies. Anchovies are smelly, oily and fishy. This doesn’t keep me from loving them, but if it keeps you from loving them, do not be scared of sardines – they are nothing alike except that they both come in a tin. Sardines are actually much more mild, like tuna.

Fisherman’s Breakfast

Fishermen's Breakfast

Ingredients:

  • 4-5 small red potatoes, cut into small cubes
  • 1 shallot, diced
  • 1 small bunch of parsley, chopped
  • 2 cloves of garlic, minced
  • 1 tin of sardines
  • 4 large eggs
  • salt and pepper
  • toast or bread

fisherman breakfast ingredients

Method:

  1. Preheat Oven to 500 degrees. Place an ovenproof dish into the oven for 5 minutes to pre-heat.
  2. Combine the diced potatoes, shallots, garlic, parsley and some salt and pepper in a small bowl, then from the an open tin of sardines, pour a teaspoon or so of the oil the sardines are packed in into the bowl. Mix to combine.
  3. Remove the dish from the oven, carefully, spray with nonstick cooking spray or oil and spread the potato shallot mixture into the bottom of the dish. Top the mixture with the sardines from the tin. Place back into the oven for 6 minutes.
  4. Remove the dish from oven and gently crack and pour all four eggs on top of the mixture. Season with more salt and pepper. Put back in the oven for 6-7 minutes until the white are set, but yolks are still a bit jiggly.
  5. Remove dish from oven and let sit for 2-3 minutes to let the eggs set. Serve with bread or toast and extra pepper.serve with crusty bread or toast

Lunch

One of the best things about working from home is being able to make myself lunch every day. Like, really make something, not just a sandwich. Today I made a curried carrot and lentil soup. I picked up some carrots at Bergey’s Breadbasket Produce in Chesapeake yesterday and I also had some left over lentils from dinner last night that were already cooked. I sautéed some onion, garlic and three medium carrots in olive oil, curry powder, salt, pepper, oregano, fresh parsley and a dash of coriander. When they were tender I threw in a dash of red wine and balsamic vinegar and let that reduce, then added a can of stewed tomatoes with their juice – roughly chopped and let that simmer for 20 minutes. Then I added a cup of homemade chicken broth and let simmer another ten minutes and finally added about a cup and a half of cooked lentils, stirring to combine well. Let this simmer until warmed through and the carrots are tender but not mushy. Serve with more fresh parsley and cayenne pepper (if you’re a heat freak like me). Now that’s lunch!

20131203-132312.jpg

The resourceful cook

Jeremy once told me that I was the most resourceful cook he knows. This is because I never start a meal plan for the week by deciding what I want to make, then writing down ingredients. Instead, I go to the pantry, freezer or fridge, see what random left overs or items we have, then plan our meals around that. Because most of what I cook is done without recipes, this works for me. And that’s the beauty of learning techniques versus recipes. If you know how to make a basic cream sauce, or the components of a risotto or the technique of braising meats, then you don’t need recipes. What I find to be most important is the concept of ratio. So if you know that a basic risotto calls for 1 part rice to 4 parts liquid, then you’re fine, and you can experiment to your hearts’ content without worrying about if the rice is going to dry up or if it’s going to be too soupy.

So this past week we had some kind of random things sitting around. First off, my sage plant has exploded this fall, so I wanted to use some fresh sage. I also had a huge bag of pistachios left over from camping and a half of a container of Parmesan….some of you know where this is going already: pesto! Pistachio-Sage pesto. Because, once again, if you know the basic components of pesto (basil, Parmesan, pine nuts, olive oil) you can swap each of those ingredients out for something similar (sage, Parmesan, pistachios, olive oil). I also had a huge FIVE POUND bag of quinoa that I got at Costco the other day, as well as a side of salmon that I had cut down into fillets and frozen. Finally there was a random butternut squash that I had picked up at a farm and sort of neglected.

fall dinner

I wanted to experiment with the idea of quinoa risotto. Normally risotto is made with Arborio rice, a super short-grain rice that cooks almost like a pasta. It’s cooked slowly, adding small amounts of liquid, which are then absorbed before adding more, and of course – stirring the entire time. Quinoa is also a grain and is …. not “short” but small, let’s say. I wasn’t sure if it would cream up like Arborio, which slowly releases its starch as it cooks, creating its own creamy sauce when combined with water, broth, wine, etc. But I figured it was worth a try.

The whole meal came together like this:

Step 1: fall dinner squash
Pre-head the oven to 375 F. Peel and cut the butternut squash into 1/2″ thick slices, brush with olive oil, salt, pepper and thyme, then lay out on a baking sheet and roast while putting together the rest of the meal. I only used about 1/4 of the squash (I made the rest of it into soup – resourceful!)

Step 2: 
Make the pesto by combining 1/4 cup of pistachios (shelled) with a palm full of Parmesan, a hearty bunch of sage (chopped), the juice of half a lemon, salt and pepper in a food processor. Pulse the ingredients while drizzing olive oil through the top until a nice thick paste forms.

Step 3:
Make the risotto. Start with a tablespoon of olive oil in a large skillet. Add a few cloves of minced garlic and half of an onion, diced small; cook until soft. Add one cup of diced mushrooms and a

fall dinner quinoa
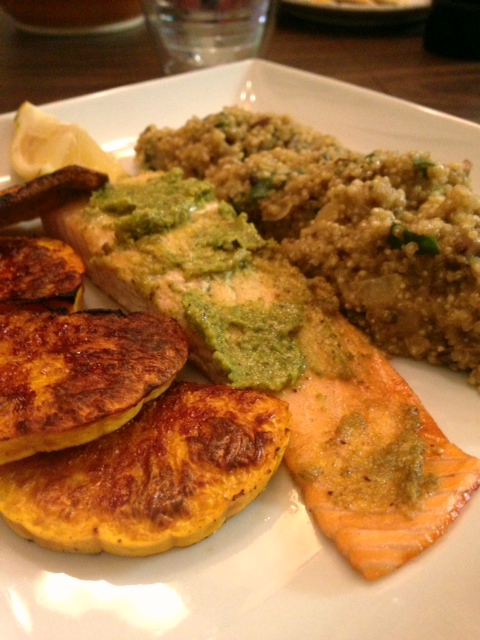
little lemon zest and saute until soft. Add in one cup of quinoa (or Arborio rice) and toast the quinoa until it starts to brown. Pour in half a cup of chicken broth and use this to deglaze the pan, and stir until it is absorbed. Continue to add half a cup of broth at a time, stirring until absorbed until you’ve reached the consistency you want. You’ll likely use less liquid than you would with a true risotto. I used about two cups of broth to one cup of quinoa. It will take about 15-20 minutes to get the quinoa cooked through. You know when quinoa is cooked because the grain sort of pops open. It’s impossible to describe, but immediately obvious when it happens. When the risotto is close to being done, within the last few minutes, add the juice of half a lemon and a large spoonful of the pesto and stir in.

Step 4:
About 10 minutes before the risotto is done, coat some salmon fillets with your pesto and put on a baking sheet in the oven with your squash. Bake the salmon for 10 minutes of until it flakes easily with a fork.

Step 5:
Serve it up! Top the risotto with a little more Parmesan and top your salmon with a bit more pesto. Your squash should be a little crispy on the outside and cooked through on the inside from roasting. Serve with a lemon wedge to brighten up the salmon and risotto.
fall dinner plate

Step 6:
Enjoy. And use these steps to make something completely different – based on whatever you have on hand.

fall dinner fork

Chili my way

We broke a record low overnight last night in Hampton Roads – 58 degrees. That is COLD for August in southeastern Virginia and when I woke up this morning and stepped out on the back porch, the instant the sub-60 degree temperate hit me, I knew we had to have chili for dinner. Does anyone else have these instantaneous food triggers? Jeremy will vouch for the fact that I CANNOT listen to mariachi music without immediately needing a taco. Like, if I hear it on TV or out in public I will literally stick my fingers in my ears and go “lalalalalala” if I think there’s any chance I can’t immediately acquire a taco. This is how I am with chili. I can go months and months without thinking about it and then a cool breeze will come out of somewhere or maybe someone is burning yard debris or ANYTHING that seems like fall and I cannot rest until there is chili.

As we all know there are about a billion ways to make and eat chili and everyone from every part of the country will swear that their way is the right/legitimate/original/best way to make it. Fine, sure. It is. But the truth is, MY WAY IS THE BEST WAY SO SHUT UP.

Rachel’s Chili

(eat it or get out)

chili bowl - rlb

Ingredients:

  • 1 lb of ground turkey
  • olive oil
  • one onion
  • two cloves of garlic, minced
  • one 15oz can of kidney beans, drained
  • one 15 oz can of chili beans, drained
  • one 14 oz can of tomato sauce (or home made)
  • one 14oz can of crushed tomatoes
  • one can of beer (minus two swigs for yourself)(actually, take three swigs)(just put in whatever is left)
  • 1/8 cup of chili powder
  • 1/2 tbs cumin
  • 1 tsp coriander, crushed
  • 1/2 tsp cayenne or hot sauce or more if you like it spicy

Optional Toppings:

  • diced onions
  • chopped cilantro
  • shredded cheese
  • lime wedges
  • sour cream or plan Greek yogurt
  • avocado slices
  • crushed tortilla chips
  • crushed saltines

Method:

  1. In a large skillet heat the oil, sautee the onion and the garlic until soft
  2. Add the turkey and cook until browned. Drain any excess fat.
  3. Put the turkey mixture and remaining ingredients into a slow cooker and cook on low for 8 hours OR put all ingredients into a Dutch oven and cook over low heat on the stovetop for 3 hours.

I prefer using a slow cooker with chili because chili is just one of those things that gets better the longer it sits. I would even recommend making this the day before you’re going to serve it (The Saturday before game day, maybe?) but for me it’s too hard to make it and not eat it the same day, but do whatever your internal fortitude allows you to do. You can see by my beer recommendations, that mine is incredibly low.

chili toppings

And of course there are the chili toppings! I like to lay them all out and let everyone decide what they want. My must haves are plain Greek yogurt and shredded cheese with a squeeze of lime. This is the one part I’ll let you decide for yourself what is best.


Figgy bruschetta

Toast slices of French bread at 375 for a few minutes until they are just lightly toasted. Remove from oven and top each slice with a thin slice of Brie. Spread the Brie gently as not to tear the bread. Top the Brie with a thin slice of prosciutto and quartered fresh figs. Return to the oven and toast until cheese is soft and beginning to melt. Remove from oven and drizzle with balsamic glaze.

20130815-195730.jpg