
I am one of those people who inevitably gets attached to a really smart, funny, indi-flavored show that the FOX executives are smart enough to give a first season, and dumb enough to cancel after two. (Think: early Family Guy, Arrested Development, Futurama, etc etc). I fear this is the fate of one of my new favorite shows, Bob’s Burgers. It constantly amazes me that these shows don’t get the viewership required to stay on the air. I guess everyone is too busy watching The Bachelor or something where people vote on who gets to push someone off a cliff or something. Anyways, this show is hilarious and comes on Sunday nights on Fox. It’s about a little burger restaurant and the family who owns and operates it. It’s great and has a bunch of great comedians doing the voices including Jon Benjamin, John Roberts, and Kristin Schaal. I love shows about food that don’t make food disgusting. This guy Bob, he really loves his burgers. He takes it seriously and he has a burger special everyday that always has a great, clever name:
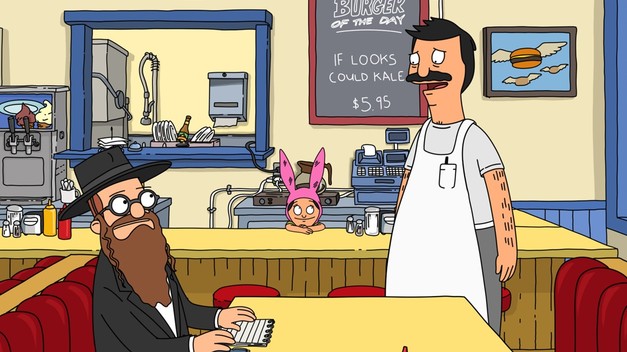
If Looks Could Kale Burger. Brilliant.
So this weekend I got inspired to make my own fancy burger. For Christmas this year my in-laws got me a cast-iron stove top griddle. One of the ones that sits on top two of your stove burner at the same time – one side is a flat top and the other is a grill. It’s awesome. It also weighs about 30 lbs. Seriously. I LOVE cast-iron, as you may remember from my last blog and my Le Creuset spiel. I love it because it lasts forever, is easy to take care of, you can take it camping and use it over an open fire, and did you know that cooking on cast iron is actually a good way to get trace iron minerals in your system? I used to be anemic, so I look for ways to make sure I’m getting enough iron on a daily basis, and this is a no brainer way to do it. Anyways, back to the burgers . . .
It’s like 20 degrees outside, so grilling on the outdoor grill is out of the question. (Hyperbole alert: this is southeastern Virginia. It is rarely ever 20. It’s more like 52, but that’s still too cold for me to spend significant amounts of time outside). So making burgers was a perfect opportunity to test out the stove top grill. I’m going to make a pretty significant confession now. Jeremy and I were craving a burger the other night, so we rolled through the Wendy’s drive thru hoping to get one of the mushroom Swiss burgers they had been advertising (hold your fire!), but apparently they had stopped selling them like the day before or something, so we never got our fix. Obviously, that was what I had to make.
A Shroom of One’s Own Burger
(a little joke for you literary fans out there)

Ingredients:
Burger:
1 lb 80/20 ground beef (local and grass-fed when and if possible)
1 egg (again, local and pasture-raised when and if possible)
1 tbs Worcestershire sauce
1/4 c. onion, minced
1/2 tsp. garlic powder
Salt and Pepper to taste
Accouterments:
1/4 cup of mayo
1 tsp Worcestershire sauce
Garlic Powder, Pepper and Salt to taste
4 Toasted Burger Buns
1 onion, sliced into thin rings
1/2 cup of mushrooms (fresh or jarred), sliced
4 slices of Swiss cheese
Method:
- Combine all of your burger ingredients in a medium bowl. I put on my surgeon gloves and combine it all with my hands.
- Divide the meat in half, then in half again so that you have four 1/4 lb pieces (you could also use a food scale). Shape each 1/4 lb into a large, flat patty. Set on a plate and refrigerate while you prep everything else.
- In a small bowl combine mayo, Worcestershire, garlic, salt and pepper. Whisk to combine. Spread generously on both sides of toasted burger buns. Set aside.
- Heat up your grill to medium-high. Put your burger and onion slices on. Flip burgers after about 3 minutes, or longer depending on how well done you want them. We like ours about medium (140-150 degrees). Flip your onions every minute or so until they become tender and have visible grill marks. In the last minute or two, add your mushrooms to the griddle and move them constantly until cooked, but not burned.
- While the burger is still on the grill, and after it has been flipped and only needs a minute or so, add a slice of cheese to each patty and let the cheese melt onto the burger for 30 seconds – 1 minute.
- Add burger, onions and mushroom to your sauced and prepped buns. Enjoy.
This burger was awesome. Juicy, flavorful, generously topped but not impossible to eat. Burgers like this makes me want to open a burger joint. Seriously, they were real yummy. We had them with “fried” (really baked) pickles dipped in home made ranch. I’m not even getting in to all that here. It’s just too much for one blog. So do me a favor, watch Bob’s Burgers (especially if you are a Nielsen family), and make these burgers. Then read Virginia Woolf. I feel like that is not too much to ask of you, dear readers.


